Get ready to see some drastic changes in how you work with PDF documents because we just released Able2Extract Professional 11 and this version is big on boosting your PDF productivity.
This latest version is aimed at making editing PDFs a simple task. Here’s a look at how the new and improved Able2Extract Professional can make PDF tasks go faster, smoother and easier.
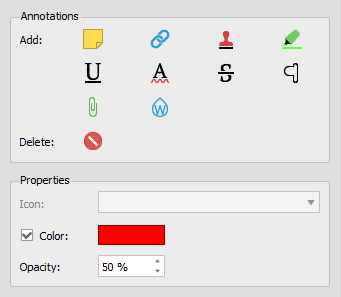
Annotate PDF Pages While Viewing Them
If you review PDFs on a daily basis, you’ll love this new addition. You can now freely annotate your PDF documents as you go. This feature lets you mark up PDF text as you would with any hard copy document.
You can digitally add new sticky notes, links, stamps, highlights, underlines, squiggly lines, strikeouts, carets, attachments and watermarks:
Whether you’re performing PDF research or adding comments on a collaborative document, you can ensure that your notes and markup stay on the page.
In addition, if you’re working with PDFs that are being sent around to team members, you can interact, review and post replies to any existing PDF comments.
Permanently Delete Sensitive PDF Data
While PDF files are meant to make your content universally accessible, there are times when you need to keep the information in them confidential.
Now instead of converting the original PDF, deleting that information and then generating another PDF from the edited content, you can simply do it right in the interface.
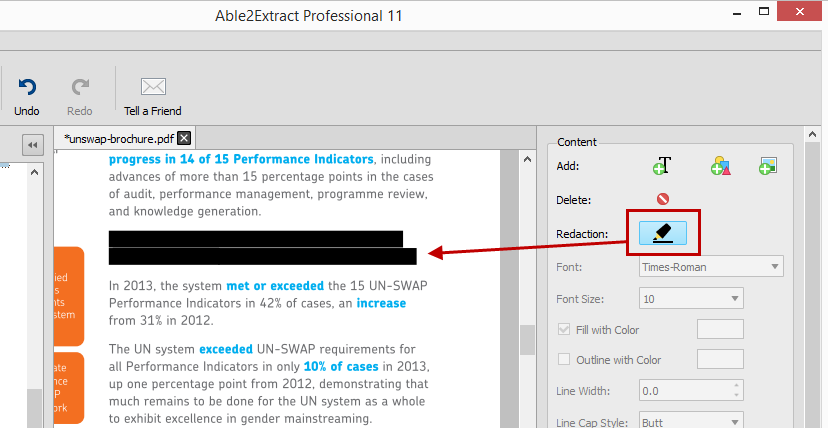
The new Redaction tool can delete any sensitive page content. And much like the content selection options, Able2Extract Professional 11 allows you to selectively eliminate either lines or entire pages from your PDF documents before you send them out.
And the best part? The deleted content remains deleted.
Create Better, Richer PDF Content
Ever deal with PDF content you wish you could improve with an small image or visual? By adding eye catching elements to marketing content, learning material or company brochures you can achieve your goals more effectively. It may sound like a tedious task, but it isn’t.
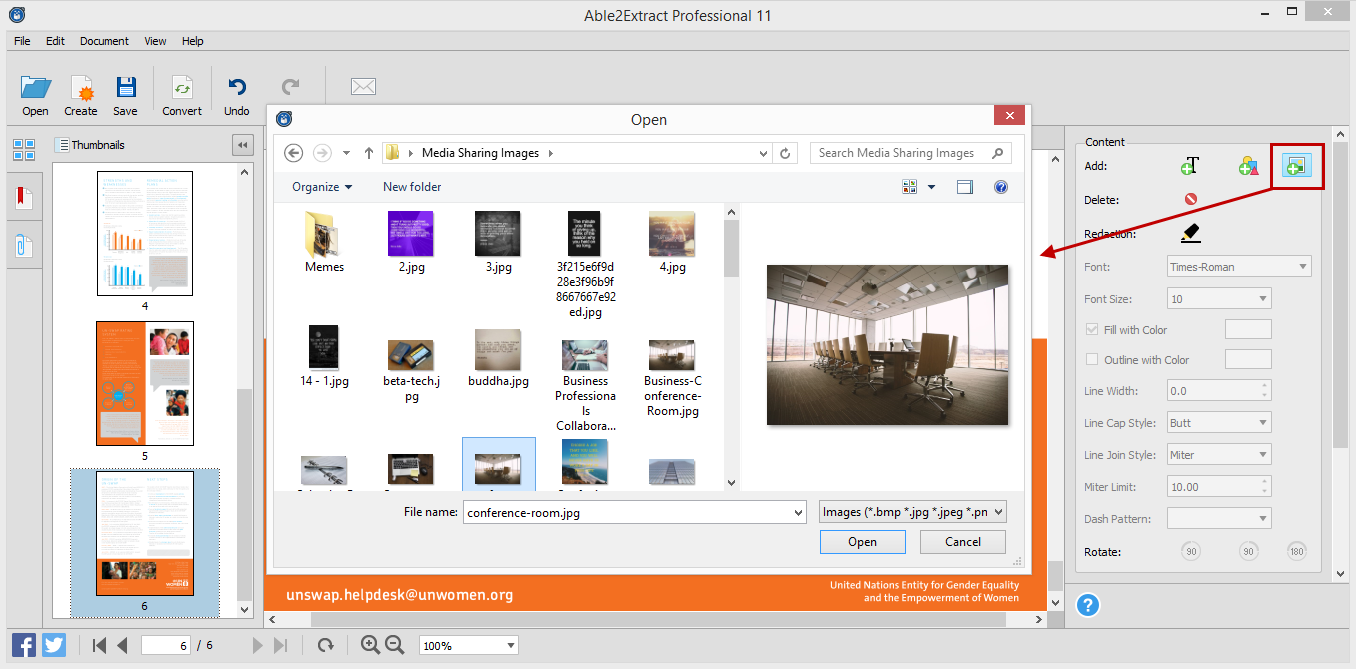
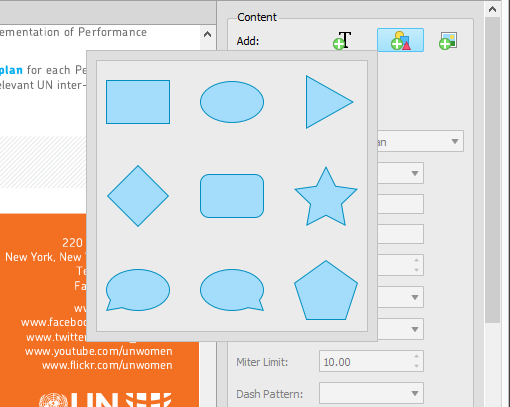
The new Able2Extract Professional will let you instantly add images, text or vector graphics directly into the PDF itself. Add existing .bmp, .jpeg, .png, .gif and .tiff images right onto your PDF pages. Or select from 9 vector shapes to insert onto the displayed page:
You can improve the content of your PDF documents on the spot through the side editing panel.
Modify Your PDF Content
Get flexible editing control over your PDF content. Able2Extract Professional 11 allows for detailed modifications with the improved PDF content editor. It lets you specify fine page content object drawing properties, such as line dash style, line cap style, line join style, and miter limit.
Refining diagrams, professional headers and text for a more polished look can be done without an external graphic design software.
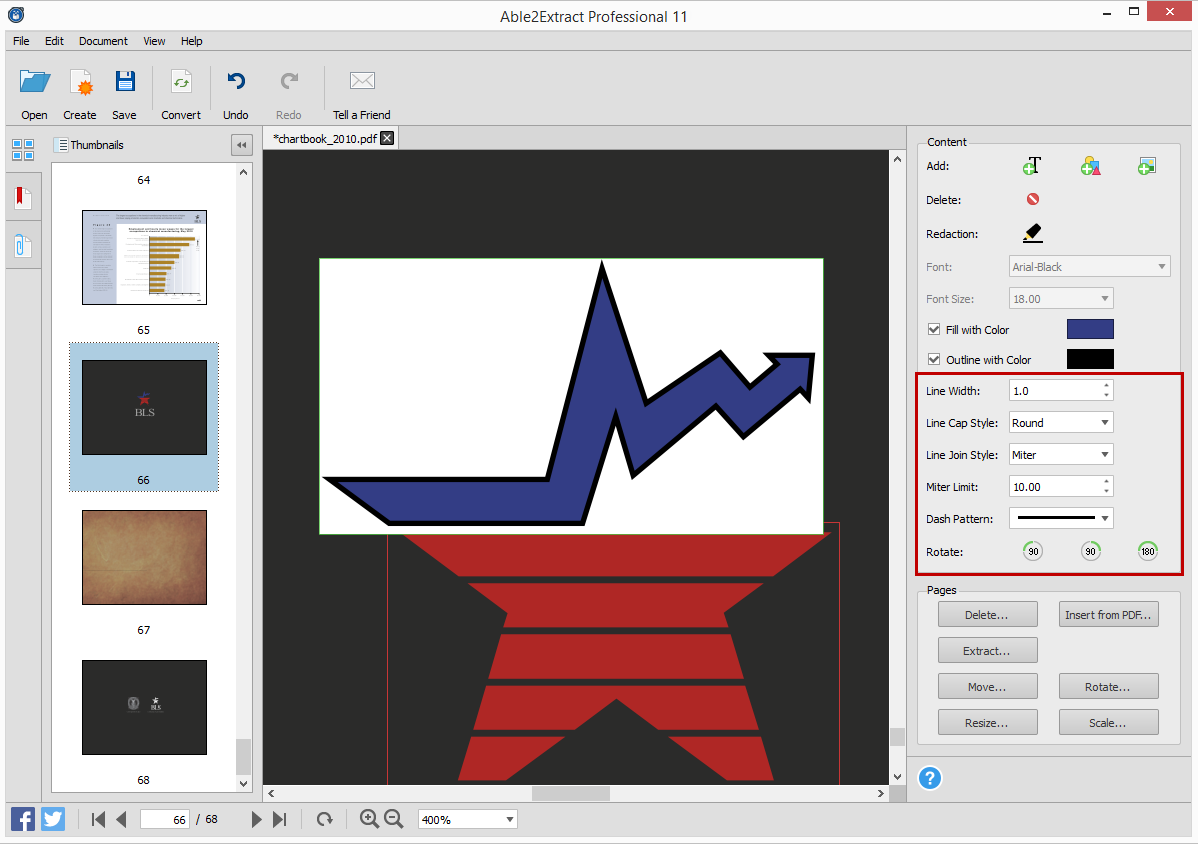
You get the ability to customize your PDF text and shapes by filling them with color and even customize their outline. You can even rotate PDF text, shapes and images by 90° and 180° with the newly added “Rotate” buttons. Experience a complete content editing experience right within your PDF.
Increase Your AutoCAD Productivity
Able2Extract Professional 11 is now an even more powerful addition to AutoCAD toolboxes everywhere. Because AutoCAD PDFs contain highly advanced content, not many PDF programs can deal with them head on. Well, with this latest version you can increase your PDF-AutoCAD productivity.
Able2Extract Professioanl 11 now allows CAD professionas to convert multiple PDFs to AutoCAD through the Batch conversion feature and transfer scanned AutoCAD PDF content into other CAD applications. The software can be integrated into your design workflow seamlessly.
Secure Important PDF Document Information
On top of the existing security features in Able2Extract Professional you can encrypt and decrypt existing PDF documents. So if you come across a secured PDF that needs a quick tweak or has a line or two that needs to be redacted, you can make your changes, decrypt the PDF and get it sent around.
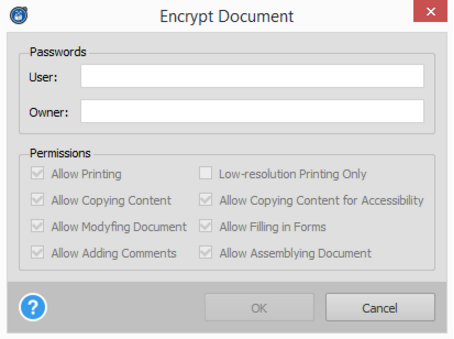
Able2Extract Professional 11 allows you to set passwords and file permissions, allowing you to customize the security on existing PDF documents on the spot.
You can get Able2Extract Professional 11 and all the above features for $149.95 on the latest Windows, Mac and Linux (Fedora and Ubuntu) systems. If you still aren’t convinced, you can see a demo of latest version in action for yourself:
Download the 7 day free trial and discover just how much it’ll improve the way you work!