How To Work Faster With Your PDFs Using Able2Extract 9

How effectively do you convert PDF files? Are you spending more time on setting things up? Making formatting adjustments after conversion? Checking in for conversions to start and end?

Well, with this short guide, we’re putting our foot down on some of the most common PDF conversion time-wasters.

If you’ve got Able2Extract, you may already be familiar with a few of the features on this list. But if you haven’t given them much thought before, you’ll want to take a closer look now. Because when combined, they can eliminate a majority of the small tasks that add up and slow you down.

Specify Custom PDF To Excel Settings Only Once

Performing a custom PDF to Excel conversion is one of the most effective ways to get your spreadsheet data right. But it’s all too easy to get caught up in getting the rows and columns formatted just right. This is why Able2Extract offers Custom Excel Templates.

When you use this feature, you can easily save your column structure and use it to instantly convert other PDF tables that are formatted in the same way. You don’t have to reset your parameters or remember how you set your conversion up.

Custom Excel Template Option

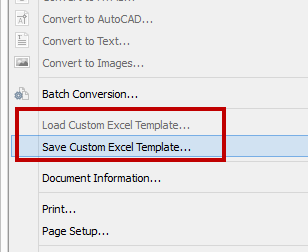
Once you have a template saved, you can simply load it to perform the same conversion any time. So if you’re dealing with customer data or PDF invoices in standardized forms, this feature can do a lot of the leg work for you.

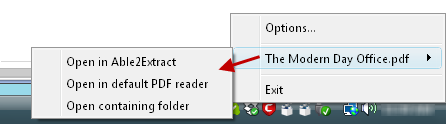
Quickly Open PDFs Without Clicking

When opening a PDF file, you probably waste more than 4 clicks to get it open and set up. Did you know that Able2Extract will let you open a file in less than half of that? Try a couple of these quick PDF-opening tricks:

  • Drag the PDF onto the Able2Extract shortcut on your desktop

This will open a new window of Able2Extract when you want to quickly start viewing a PDF in isolation, away from PDFs to be converted or edited.

Opening PDF With Shortcut

  • Drag PDF documents into the Able2Extract 9 interface

Doing this will open a PDF file within the application simply by dragging your PDF into the open application. No double clicking needed. Use this trick to work with a specific group of PDFs at the same time which aren’t located in the same folder.

Opening PDF By Dragging

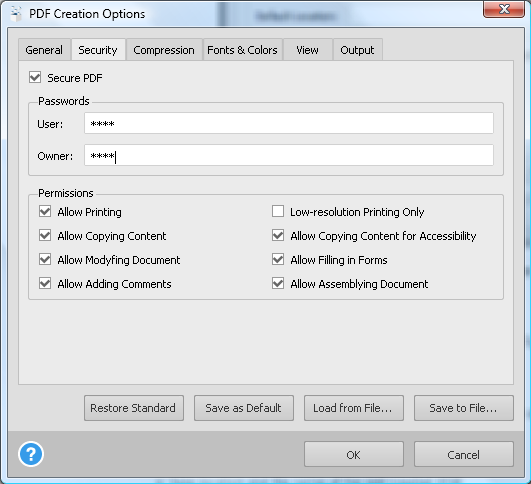
Automatically Convert To Different Microsoft Office Versions

We know that not everyone uses the same version of Microsoft Office. At one point or another, you probably came across this compatibility issue with others. Ever have to re-convert a PDF or re-save the converted Office file?

Well, instead of re-working the already converted Word, Excel or PowerPoint data, Able2Extract will let you switch up the default format even before you start converting the PDF.

Usually, Able2Extract will convert your data to the Office version you have installed by default. But you can also set the Office output format to 2007 so you convert to the .docx format regardless of the Office version you have installed.

  1. Go to View> Conversion Options
  2. In the dialog, depending on the format you’re using you can,
  • Switch the PowerPoint default format from the General tab
  • Switch the Microsoft Word default format from the Word tab. You can choose between .RTF and Word 2007.
  • Switch the Microsoft Excel default format from the Excel tab. Select between .CSV and Excel 2007.

To make things even easier, you can save your conversion settings as a file. This way you can easily switch between different Office output settings as needed.

Convert To Different Worksheets With One Click

Excel conversions are hard to nail. Oftentimes, you may opt to simply extract everything into one worksheet and then spend a few minutes, post-conversion, moving data around into different worksheets.

If that’s the case, then you should take a look at the Excel Single Worksheet feature. With this functionality, Able2Extract converts selected data from your PDF into one single Excel worksheet.

Excel Single Worksheet Option

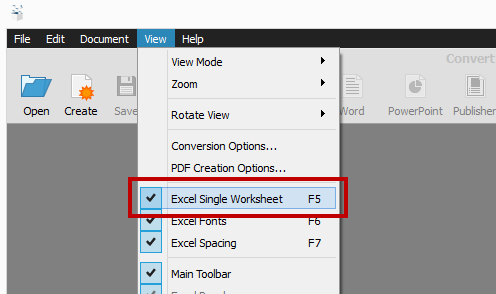
By default this is turned on. So if you want to break up your converted data and get each page into separate worksheets for more precise conversions, you can do so before you convert. Here’s how:

  1. Go to the View menu
  2. Click on Excel Single Worksheet to remove the checkmark next to it.

Microsoft Excel Multiple Worksheets

Or you can simply hit F5 to turn the feature off.

Automate And Perform Multiple PDF Conversions At Once

With Able2Extract’s batch conversion, you can get the most done with the least amount of effort. Of all the features in this list, the Batch Conversion option is the one that saves you the most time as it works on multiple PDFs at once. If you have a handful of straightforward conversions to the same format, use this feature.

Automating Batch PDF Conversion

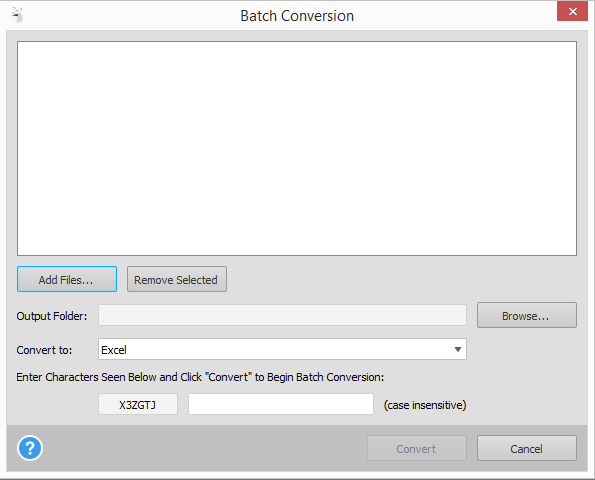
The process is automated, so you don’t have to sit and supervise each process as Able2Extract goes down the list. Just set it up and Able2Extract will take care of the rest. You can quickly access the feature from the command toolbar or by hitting CTRL + V.
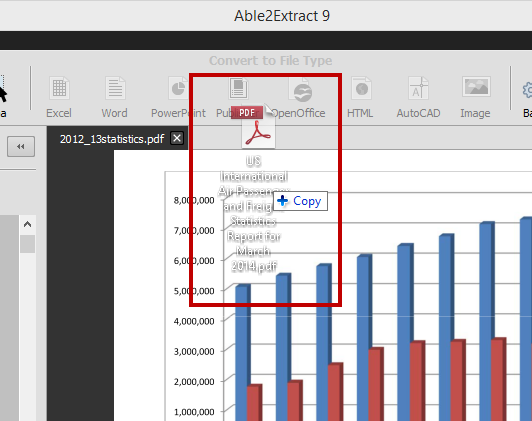
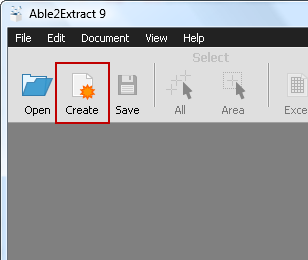
PDF Page Editing Made Easy

Editing Pages

With digital and mobile workflows trending in the office place, it’s all about the 2 P’s: Paperless Productivity. And for us in the PDF industry, this not only means going digital with your documents, but that you work efficiently with them as well.

To that end, one of our goals is to make it so that you don’t have to resort to other tools to get a separate PDF task done. And we’ve made some great progress towards that goal with Able2Extract 9.

You already know about its proven track record with multiple conversion options, and are now just getting a taste of its PDF creation abilities.  Curious about its PDF editing features, too?  Here’s a quick orientation guide for you.

Able2Extract’s PDF Editing Features

You can find these features by going to Edit>Pages in both the Standard version and the Professional version for editing scanned PDF files.

PDF Page Editor

As a PDF editor, Able2Extract can do a few things to alleviate some of the panic you experience when opening a less than perfect PDF document.

Delete

Got redundant pages? We’ve all had them at one point.  Whether they’re pages meant for specific people, blank eBook pages, or automatic page inserts, they add to the file bloat and extra scrolling. Good news is that you don’t have to put up with them anymore.

Deleting PDF Pages

Once you have your PDF opened in Able2Extract 9, you can delete PDF pages by specifying the page range and clicking on Delete. Enter the same page number in both fields to delete a single page. Your PDF page content will automatically shift up or down, of course, but the unnecessary page will be gone.

Move

Being able to move PDF pages comes in handy for long document revisions or PDF presentations where content order is especially important. When you need to rearrange or re-order pages in your document, use this feature.

Accessing this option will give you the following dialog:

Moving PDF Pages

Just input your page range accordingly and the number of the page you want your selected range to be placed before. Note that your page sequence is modified after each move. So be sure to use the most recently modified page numbering to define the Put Before Page value for your next PDF page move.

Resize

The Resize PDF pages feature acts like a cropping tool that can help you cut out large margins or unnecessary white space, this is the feature to use. In other words, this feature resizes your pages, not your content.

Resizing PDF Pages

You can adjust your page(s) dimensions as needed, resizing as much or as little as you want. Don’t forget to set the measurement units to either inches, centimeters, millimeters or points when using this feature! Once you have your values set, click on Resize.

Adjusting PDF Page Dimensions

Scale

Unlike the Resize feature above, Able2Extract’s scale PDF page option will let you change both the PDF page content and size together.

Scaling PDF Pages

The scaling measurement is done by percentage. It can be adjusted up to within 0.01% of the scale needed, so your content remains consistent and accurate, no matter what size the page is.

Adjusting PDF Content Dimensions

Rotate

The Rotate PDF page feature is designed for PDFs that with page content that appears upside down or sideways. This can usually happen with full page images that are originally in landscape mode, but are included in a portrait oriented PDF.

Rotating PDF Pages

The benefit? Instead of extracting the pages and re-creating the PDF, you can simply give a specified page (or page range) a good 90 degree turn in Able2Extract 9.

To get the full Able2Extract editing experience, give these features a go with a 7-day free trial for Able2Extract Standard or Able2Extract Professional for converting scanned or image PDFs.

A 6 Tip Starter Guide On Document Management

Document Management

Ask yourself, how much time do you spend looking for a single document? Could your file-managing habits use some improvements?

If you work on a computer every single day, it’s all too easy to drown in a pool of digital formats. You create presentations, write essays, analyze spreadsheets, and edit images.

And at one point or another it all gets saved and stored, proving at the same time that document management is behind almost everything we do electronically.

If you need a few quick fix tips, we put together a guide on some basics to keep in mind which can help improve any digital document routine.

1. Organize Email Attachments And Documents

This is a great place to start. Your email is a powerful tool which is unintentionally used as a document management tool, as well. You email files to yourself, use it to recover accidentally deleted files, send and forward files to others, and receive them yourself on a daily basis–all of which is easy. Digging them up, on the other hand, isn’t.

For situations like this, download your attachments in bulk with a tool like Mail Attachment Downloader by GearMage. Doing so can help you transfer and organize file attachments into your document system smoothly. It can extract and download email attachments from Gmail, Hotmail, Yahoo and other IMAP/POP accounts. Filter out file types, specify download location and other specifics.

2. Integrate Cloud Storage Into Your Routine

The web has grown into a cloud computing platform that makes everything accessible online. Yet cloud services can create more stress than they’re worth if you don’t plan out how you’ll be using them.

Uploading Files To Cloud

Upload files wisely by integrating them with your working habits. A few methods to consider:

  • For mobile work, automate your apps to upload files from your device straight to the cloud.
  • Use dedicated services for different formats.
  • Create a designated cloud folder “recycle bin” to download stuff you won’t need permanently. It will keep your local folders free of junk files.

3. Create A Nested Folder System

This tip is a must. A structured folder system is reflective of how you remember information. It can literally point you in the right direction with every level you click through.  All you need to do is make sure that your folders have a logical hierarchy.

Start off with a main folder. Then start creating sub-folders to filter out files like on-going work from finished work, current documents, documents for review or documents organized by year. The main thing to remember is to label folders according to your work process.

Saving Files

4. Use A Standard Naming Convention

Use consistent and logical file naming conventions. File names should include things like dates, document status, names–details that can pinpoint and categorize the file’s contents.

File names should be easily scannable, naturally ordered, and highly descriptive.  Some suggestions:

  • Make updated files stand out by using an underscore before the date.
  • Decide on the format such as dd-mm-yy or first name, last name.
  • Use a numbering scheme to keep large folders of files in order.
  • Don’t be cryptic with special characters, acronyms or generic terms. Chances are you won’t remember what they referred to later on.

5. Separate Your Files By Format

Sometimes file names won’t come to mind as easily as the format will. If this is the case with you, you may want to organize your files by format. If you use this method along with nested folders, it can be a faster way to find a file. You don’t have to re-sort or sift through a folder full of different file formats.

6. Archive And Delete Files Regularly

The worst part about creating documents is that they can quickly get outdated or obsolete especially with files created ad hoc. Set up a time frame for yourself to delete files regularly to keep them from piling up.

With the way file management and creation is constantly evolving, knowing just a few of your habits can go a long way to creating a document management system that works with you. What are some of your best practices?

How To Create Secure PDF Documents In Two Different Ways

Here at Investintech, we care about your document productivity and we know that working with multiple documents can be a dreadful uphill battle. Because digital documents and PDFs are an essential part of your day to day work, your document processing routine and PDF tools always need to be updated. They need to be flexible and powerful enough to keep up with you.

This is why we included the features we did in Able2Extract 9. Though you know the PDF tool as Able2Extract PDF Converter, it has gone above and beyond that in this latest version. It can do a whole lot more now—and more conveniently.

Case in point: PDF creation. You may have given the main feature a  quick try, but there’s more to this feature than meets the eye. It can get the job of creating secure PDFs done in more ways than one.

Let’s take a closer look.

Method 1: Create PDF Files With Able2Extract 9

PDF creation within Able2Extract is just as simple as converting a PDF document. So if you’ve ever converted a PDF file with Able2Extract, then you already have a good idea of how to create one.

In other words, you get a new feature with a familiar set up, eliminating any high learning curves that can waste a good chunk of your time. From the command toolbar:

1. Click on the create PDF icon.

Creating PDF Files2. Open your file.

Opening File In Able2Extract

3. Go into the PDF Creation Options… menu and add your PDF security options. Here you can choose a number of settings for your PDF content. Click on OK.

PDF Creation Security Options
4. Then click on Save to complete the process.

Saving PDF In Able2Extract

Method 2: Create Secure PDFs From Your Everyday Applications

That’s just one method. However, if, like me, you prefer to stay in the application you’re working in, Able2Extract still has you covered. With the virtual printer, you can turn any application into a PDF creator.

Just print up your document as usual with the Print functionality, but choose Able2Extract 9.0 Printer instead:

Able2Extract Virtual Print Driver

Yet because you don’t need to open Able2Extract to create PDFs, you may be thinking that you’ll miss out on all the PDF creation options built into this latest version. Not so. This is where the print dispatcher comes into play.

Adjust Settings With The Print Dispatcher

Accessing Able2Extract Print DispatcherYou may have seen this icon lurking around on your system tray after installing Able2Extract.

The Print Dispatcher allows you to control all of your out-of-Able2Extract  PDF creation options.

When combined with the virtual print driver, you can create the same secure PDF just as easily.

On opening the Print Dispatcher, you get everything you need to stay on top of the PDF creation process:

Print Dispatcher Interface

By clicking on the Options… button, you can change the PDF creation settings for all PDF files created through the Able2Extract Print Driver, including the Security settings for each file.  

Selecting PDF Security Options

After your security options are set and your PDF is created, you can check in on your new file from the Print Dispatcher and interact with the file as needed.

Options For Opening PDF

Give the PDF creation feature a good spin if you haven’t already. This is just one of many new Able2Extract 9 features that let you get up close and personal with your PDF documents.

Work With Excel Data Like A Pro With 9 Simple Tips

Excel Spreadsheet Diagram

Without doubt, an Excel spreadsheet is one of the most advanced tools for working with raw data—and one of the most feared.  The application looks complicated, way too advanced, and like something that would take hours to figure out.

I wouldn’t be surprised if upon hearing that you had to start using MS Excel, your heart started to pound. Is there any way to make Microsoft Excel less scary and intimidating? Yes.

By learning a few spreadsheet tricks, you can bring Excel down to your level and start looking at the application in a different light.  We rounded up some of the simplest yet powerful MS Excel spreadsheet tips you can start using on your data.

1. Use MS Excel Format Painter

To start you off, get yourself familiar with formatting your spreadsheet cells. A visually organized spreadsheet is highly appreciated by others as it can help them follow your data and calculations easily. To quickly apply your formatting across hundreds of cells, use the Format Painter:

  1. Select the cell with the formatting you wish to replicate
  2. Go to the Home menu and click on the Format Painter. Excel will display a paintbrush next to the cursor.
  3. Using Excel Format Painter
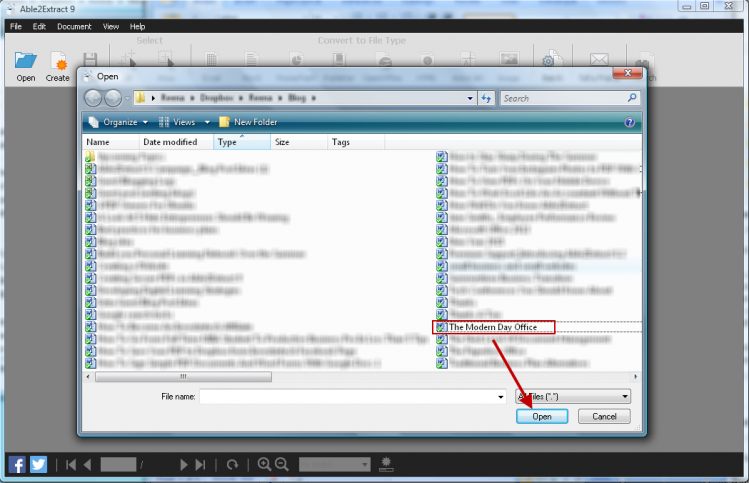
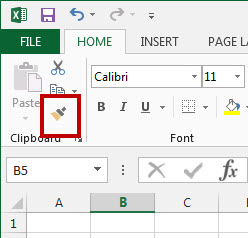
While that paintbrush is visible, click to apply all of the attributes from that cell to any other.

To format a range of cells, double-click the Format Painter during step 1. This will keep the formatting active indefinitely. Use the ESC button to deactivate it when you’re done.

2. Select Entire Spreadsheet Columns or Rows

Another quick tip– use the CTRL and SHIFT buttons to select entire rows and columns.

  1. Click on the first cell of the data sequence you want to select.
  2. Hold down CTRL + SHIFT
  3. Then use the arrow keys to get all the data either above, below or adjacent to the cell you’re in.

You can also use CTRL + SHIFT + *   to select your entire data set.

3. Import Data Into Excel Correctly

The benefit of using is Excel is that you can combine different types of data from all kinds of sources.  The trick is importing that data properly so you can create Excel drop down lists or pivot tables from it.

Don’t copy-paste complex data sets. Instead, use the options from the Get External Data option under the Data tab. There are specific options for different sources. So use the appropriate option for your data:

Importing Data to Excel

4. Enter The Same Data Into Multiple Cells

At one point, you may find yourself needing to enter the same data into a number of different cells. Your natural instinct would be to copy-paste over and over again. But there’s a quicker way:

  1. Select all the cells where you need the same data filled in (use CTRL + click to select individual cells that are spread across the worksheet)
  2. In the very last cell you select, type in your data
  3. Use CTRL+ENTER.  The data will be filled in for each cell you selected.

5. Display Excel Spreadsheet Formulas

Viewing Spreadsheet Formulas

Jumping into a spreadsheet created by someone else? Don’t worry. You can easily orient yourself and find out which formulas were used. To do this, use the Show Formulas button. Or you can use CTRL + `  on your keyboard. This will give you a view of all formulas used in the workbook.

6. Freeze Excel Rows And Columns

This is a personal favourite of mine when it comes to viewing lengthy spreadsheets. Once you scroll past the first 20 rows, the first row with the column labels annoyingly disappear from view and you begin to lose track of how the data was organized.

Freezing Excel Columns Rows

To keep them visible, use the Freeze Panes feature under the View menu. You can opt to freeze the top row or, if you have a spreadsheet with numerous columns, you can opt to freeze the first column.

7. Enter Data Patterns Instantly

One great feature in Excel is that it can automatically recognize data patterns. But what’s even better is that Excel will let you enter those data patterns to other cells.

  1. Simply enter your information in two cells to establish your pattern.
  2. Highlight the cells. There will be a small square in the bottom right hand corner of the last cell. Excel Data Patterns
  3. Place your cursor over this square until it becomes a black cross. 
  4. Then click and drag it with your mouse down to populate the cells within a columnEntering Spreadsheet Data Patterns

8. Hide Spreadsheet Rows and Columns

In some cases, you may have information in rows or columns that are for your eyes only and no one else’s. Isolate these cells from your work area (and prying eyes) by hiding them:

  1. Select the first column or row in the range you want to hide.
  2. Go to Format under the Home menu.
  3. Select Hide & Unhide>Hide Rows or Hide ColumnsHiding Excel Rows Columns

To unhide them, click on the first row or column that occur just before and after the hidden range. Repeat steps 2 and 3, but select Unhide Rows or Unhide Columns.

9.  Copy Formulas Or Data Between Worksheets

Another helpful tip to know is how to copy formulas and data to a separate worksheet. This is handy when you’re dealing with data that’s spread across different worksheets and requires repetitive calculations.

  1. With the worksheet containing the formula or data you wish to copy opened, CTRL + click on the tab of the worksheet you want to copy it to.
  2. Click on or navigate to the cell with the formula or data you need (in the opened worksheet).
  3. Press F2 to activate the cell.
  4. Press Enter.  This will re-enter the formula or data, and it will also enter it into the same corresponding cell in the other selected worksheet as well.

These general tips won’t turn you into an Excel guru overnight. But they can help you take that first step towards becoming one! Are you a well-seasoned Excel user? Which of your spreadsheet tricks would you add?