Trim Down Large PDF Files With These 5 Simple Tips

Trim Down Large PDF Files

One of the biggest pet peeves of dealing with a PDF file is the large file size.  There’s nothing worse than an email stuck in your outbox because of a large PDF attachment—unless, of course, it’s a slow PDF download from the web.

How can you slim down the size of your PDF document? While this heavily depends from PDF to PDF and the type of content it contains, there are a few general PDF creation options in particular which you should pay close attention to.  Some fine-tuning here and there will go a long way to shave the megabytes off of your file.

Use The “Save As” Command

This is a good place to start to cutting down the bloat.  Every time you hit Save in an application, you end up with a usually bigger file size. This is because the function saves the changes and appends them to the file. The same goes for PDF files.
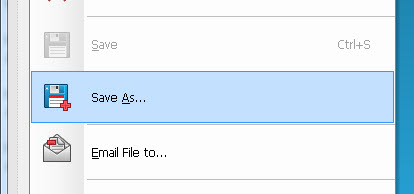
Saving PDF files

Instead, use the “Save As” command. By doing this, you overwrite the entire file, eliminating unused objects and accumulated changes. The result is a smaller PDF file you can manage. So go for the “Save As” option once you’ve added everything you need to your PDF.

Compress And Downsample PDF Images

Given the visual nature of digital content today, images are a big part of PDF files. However, if your PDF isn’t intended for high resolution needs, you can keep your file under control by downsampling and compressing your images. When you downsample bitmap images you basically decrease the amount of pixels in it which reduces the overall resolution and hence, the size of the PDF.
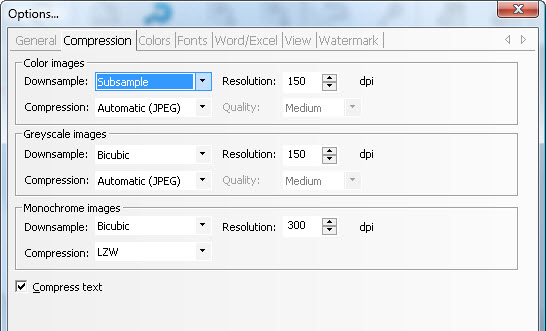
Compressing PDF Images

Downsampling options will tell your PDF program know how you want to delete those pixels. You’ll be able to choose mainly between bicubic, subsample, and average downsampling methods. Each has its own advantages, so choose wisely. As well,  you can  usually set the desired resolutions and decide if you want to compress your images using popular compression algorithms such as  ZIP, LZW, or JPEG.

Choose The Right Colour Space

You may have heard of RGB and CMYK colour spaces before. Each one has different methods of handling colour. In general, CMYK is ideal for print purposes, while RGB caters to on screen viewing.

If your PDF is mainly going to be viewed on the web or on a computer screen, choose the RGB colour space for your PDF images.  In some PDF creators, you can choose to convert CMYK images to RGB if needed. It requires less data than CMYK. And one less data channel means a smaller file size. 

Subset Your Fonts

By embedding fonts, you are essentially attaching the entire character set within the PDF, which can puff up the file significantly. Try to subset the fonts instead. It will keep the PDF size to a minimum.

Embedding PDF Fonts Options

When you subset a font, you attach only the font characters that are used in the PDF. If a special character like “#” isn’t used in the file, the character won’t be included. In most cases, you can choose to automatically subset fonts if the character usage is less than a certain amount. Take advantage of this feature if you have it. Your PDF fonts are just as equally important as your images.

Remove Unnecessary Frills

Depending on who and what your PDF content is intended for, you can scale down the bloat considerably. Applications that create PDFs for specific needs, like Adobe’s Photoshop for instance, will allow you to save PDFs with advance settings such as Preserve Photoshop Editing Capabilities.

But if your PDFs won’t be exclusively opened in Photoshop for editing, then there’s no need to prep the file for it. Thus, before you save a PDF with all the bells and whistles, get a good idea of how your PDF will be used and you can easily reduce the size accordingly.

PDFs are supposed to be high in quality, but it doesn’t necessarily mean that it has to be reflected in the file size. You can get a manageable PDF file with just a few adjustment s. And as an added bonus, you can accomplish most of these tweaks with Sonic PDF Creator. Just go to View>Options for Creation…. and you can access them through the dialog.

4 Great Ways To Make PDF eBook Navigation Easy

PDF eBook Reading

In this day and age of DIY e-publishing, the PDF is an invaluable format. If you’ve ever downloaded an eBook resource from a website or blog before, then you know how convenient it is to have all the information and content you need in one single PDF.  Yet sifting through all that content in lengthy PDFs can be a nuisance. 

PDF navigation may seem like a small issue, but believe it or not, there are PDF files that don’t come as well-structured as they should be.  Make it as easy as possible for your readers to navigate through your PDF eBook.

Here are a few quick tips to start you off.

1. Add Bookmarks 

Bookmarks are perfect for breaking up your PDF into manageable chunks. Your readers can get a visual overview before they even start scrolling through the PDF.  Most PDF creator applications will let you manually create bookmarks. In other cases, your PDF bookmarks will automatically be created if the formatting of your source document (such as MS Word) uses paragraph default styles, like “Heading 1,” to format your content.

PDF bookmarks for eBooks

For eBooks covering big topics that are broken down into smaller sections, create nested bookmarks. Nested bookmarks create a hierarchical parent/child list that can be easily expanded or collapsed, pointing your readers to even more specific locations in your eBook. Just remember to generate bookmark titles that are simple, consistent and descriptive.

2. Add Internal Links

Where possible and appropriate, insert links into your PDF eBook.  If done properly, a page link can be an extremely effective way of directing your readers to relevant sections. This is especially handy in eBooks that are dense with information. You can direct your readers to the necessary sections.

Whether it’s to a glossary, an illustration, or to related sections, a link in the right place can go a long way.  You can even use links within your Table of Contents and make it a one-click process to get to a section. Internal links are a great way to boost the organization and reading flow of your content.

3. Include A Table Of Contents

Depending on the amount and type of content in your eBook, a bookmark list might enough to guide readers along. But when in doubt, it’s always good publishing practice to include a Table of Contents where you’ll have more than 10 pages.

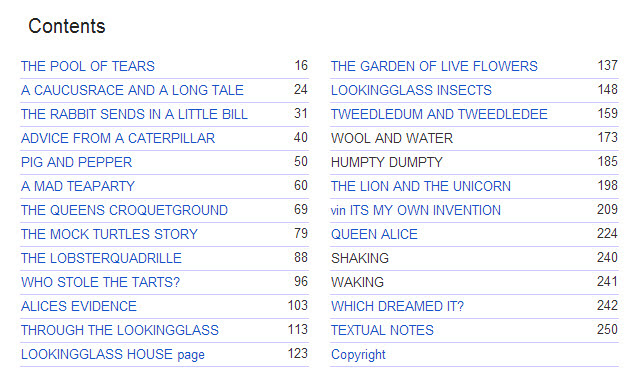
PDF Table of Contents Keep in mind that PDF files can be either viewed on screen or read in printed form. In cases where users wish to print up a 100 page eBook, they’ll need a Table of Contents page for off-screen reading.  Just don’t forget to include page numbers in the footers/headers of your PDF eBook!
4. Integrate Interactive Navigation

In addition to the default navigation controls of PDF readers, you can insert navigational controls such as page buttons directly into the PDF content itself.  Sounds hard, but with the right software you can create a navigable PDF button from linking a specified trigger area (button) with a target action to a page.

This is a perfect fit for eBooks containing multimedia and other dynamic content. However, just remember that what icons or controls may be intuitive to you, might not be to other users. Thus, if your navigational controls go beyond flipping from one page to the next, include a discreet legend.

In short, the easier it is to get through your PDF eBook, the better! What do you do to make your PDF eBooks easy to navigate?  If we missed a tip or two, share it in the comments!

Able2Doc 7.0 Tip: Taking A Snapshot From PDF Documents

Despite the pressing need to work with PDF content, PDF conversion, despite all its benefits, might not always be what you need.  Think of those times when you need just a snippet of PDF content in a document, like when you conduct research with PDF files, for instance.

Copying and pasting on your computer is probably the first thing that comes to mind.  It’s a common, yet often messy, way of getting text or images into MS Word documents quickly. However, the results you have to edit afterwards are one major reason why PDF conversion is usually the better option.

But knowing that our users may still want the option of doing so, our desktop converters include a Snapshot feature. It gives you a way to create a proper snapshot of selected PDF content. For a more detailed look, here’s a walk through on the feature and how you can take a snapshot with Able2Doc 7.0.

1. Open your PDF file in Able2Doc 7.0

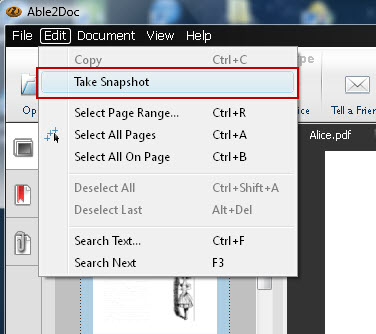
2.  Go to Edit> Take Snapshot.  This will activate the feature and let you select a portion of the active PDF to be saved to the Clipboard as an image

Take Snapshot feature in Able2Doc

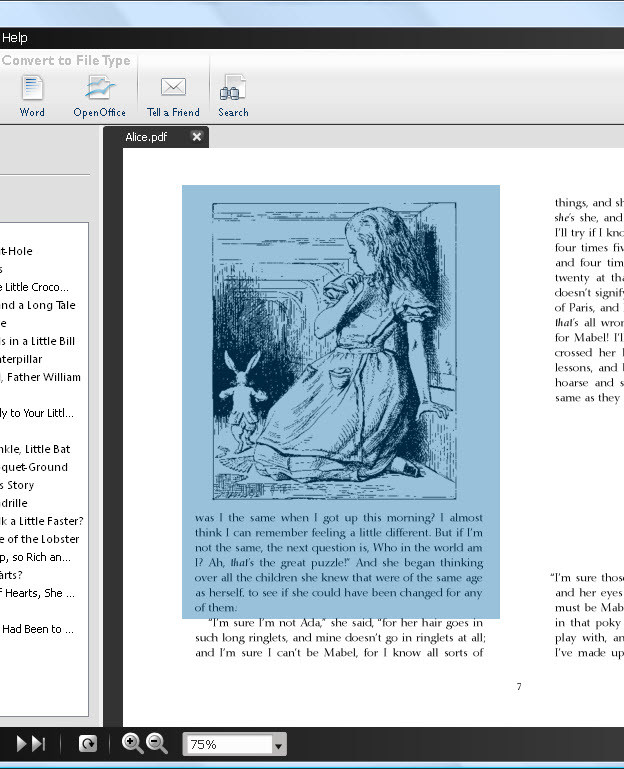
3. Using your mouse, select the image or content that you would like to save as an image, as you would normally select an area for converting PDF content

Selecting PDF content for Snapshot

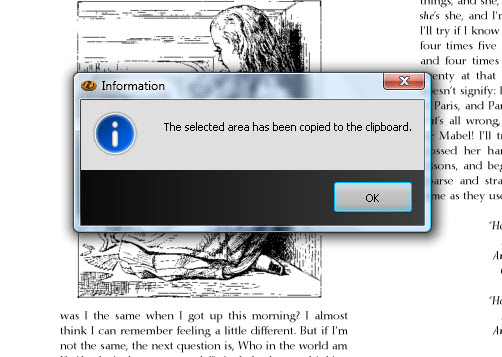
4. Once the selection has been made, you’ll get a popup letting you know that the content has been saved to the clipboard

Copying PDF content to clipboard

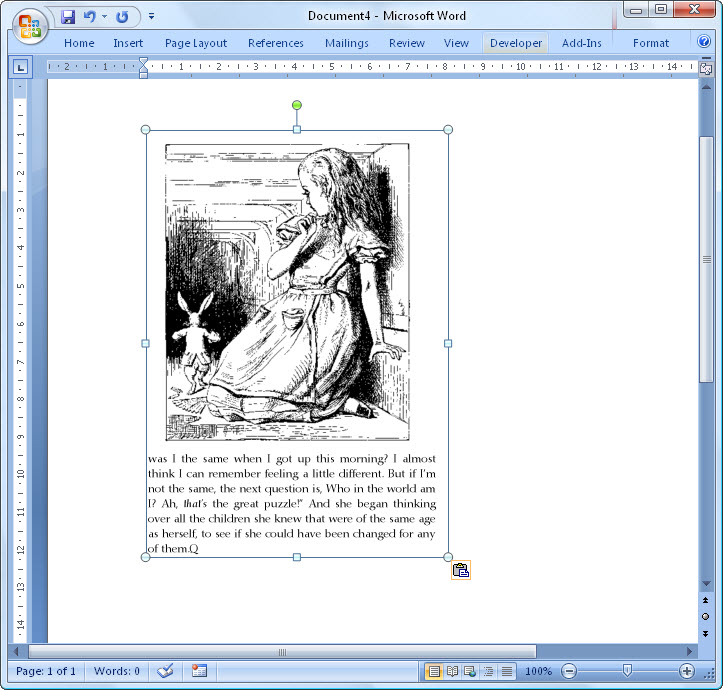
5. Go to the file or document where you need to insert the content. Then simply paste the content from your clipboard using CTRL + V or by selecting Paste from the right click context menu.

 Pasting PDF content in Word

This tip is also applicable to Able2Extract PDF Converter. For scanned PDF documents, the only selection method available is area-based selection (this option enables data to be selected on a column-by-column or section-by-section basis rather than line by line).

So if you ever find yourself needing a quick image of your PDF content, the snapshot feature can get the job done easily.

Introducing The First Universal PDF Converter On The Market: Able2Extract 8

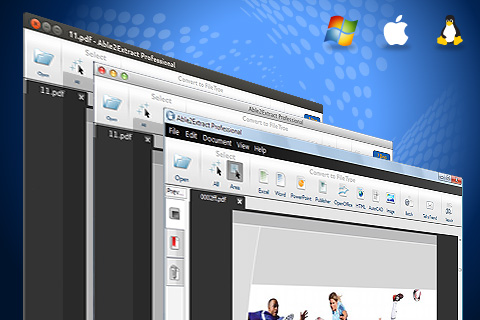
We are excited to announce the release of Able2Extract  8! This latest version is a landmark release in the PDF industry today.   In a first for Windows, Mac and Linux, Able2Extract 8 is the first cross platform PDF converter that is compatible on all three major operating systems.

Cross Platform Compatibility

Our developers have worked hard the past year to ensure that every user, regardless of platform or hardware, can enjoy the same quick, accurate conversions that, up until now, only Windows users have been able to enjoy.

And it’s paid off.

Not only can Able2Extract 8 operate on different platforms, it can run even better than ever with a few new features and some powerful tweaks.

Cross Platform Compatibility with Mac and Linux for the First Time

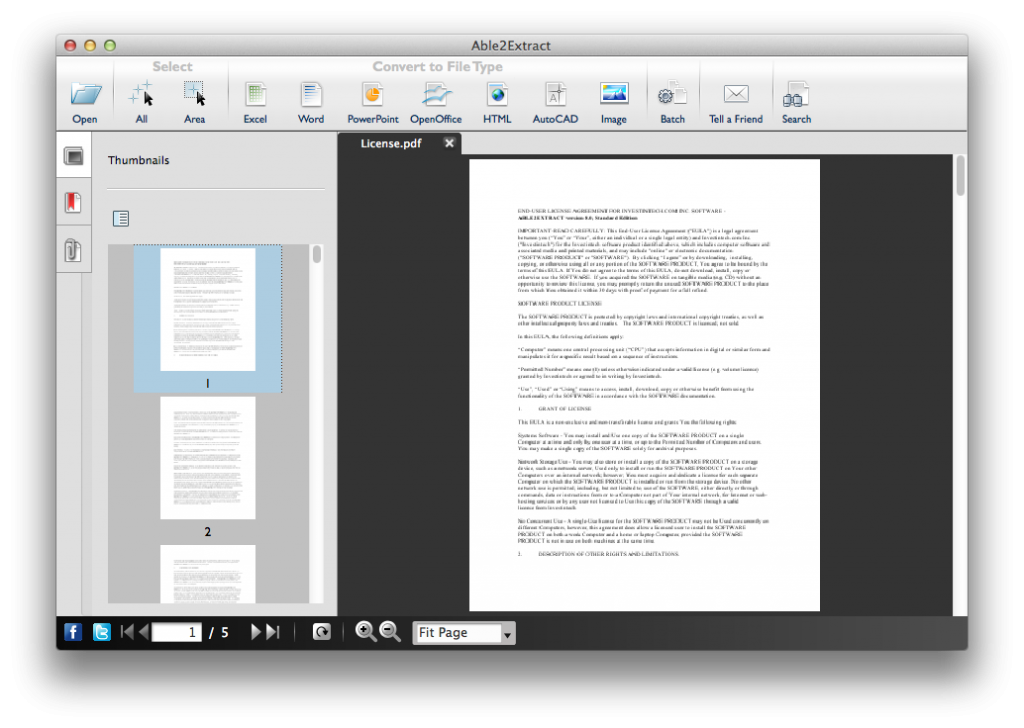
Thus far, Able2Extract has been available exclusively on the Windows platform. Not anymore.  Able2Extract PDF Converter 8 is now available on the Mac OS X platform.  Mac users on the latest Mountain Lion operating system can take full advantage of the same conversion options and features that are offered in the Windows version.

Able2Extract 8 Mac version

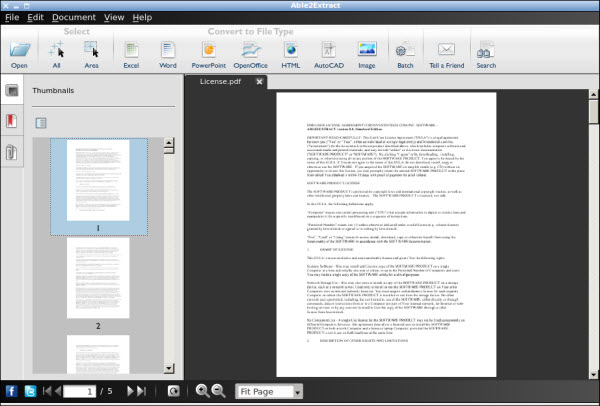
And this goes for the Linux platform as well. Users on the Ubuntu and Redhat distributions can finally convert files without any command line tools or complicated scripts. Conversions are now straightforward and simpler through a graphical user interface.

Able2Extract Linux Version

Intuitive PDF to Excel Custom Conversion Interface

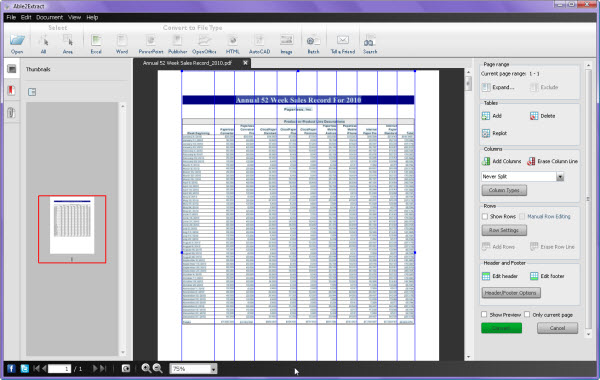
Following this same straightforward simplicity is our newly redesigned PDF to Excel custom conversion interface.  You can now customize your rows, columns, tables and footers in a more direct way with single click customization options.

PDF To Excel

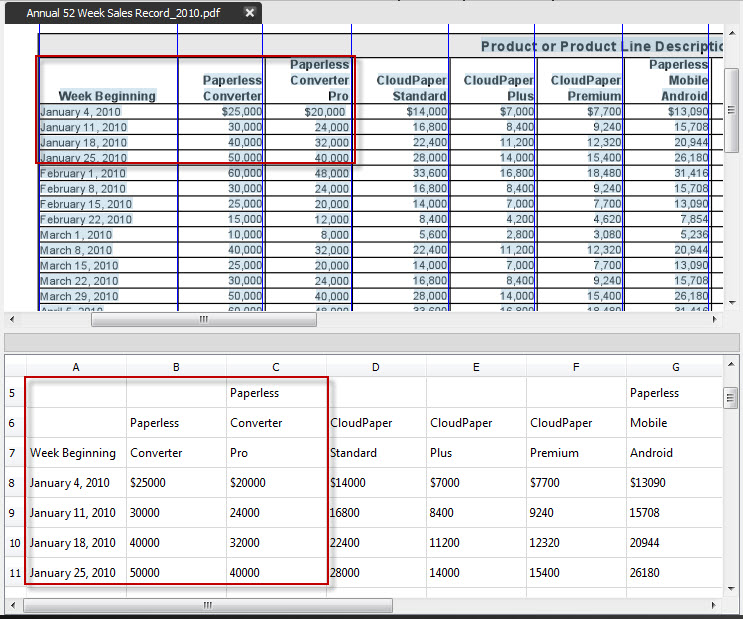
Also new to our PDF to Excel custom conversion is the Show Preview option. It allows you to see your conversion results before you hit the Convert button.

Able2Extract Show Preview Feature

 Give the new features a try on your most complicated PDF tables!

New Easy PDF Navigation & Viewing Features

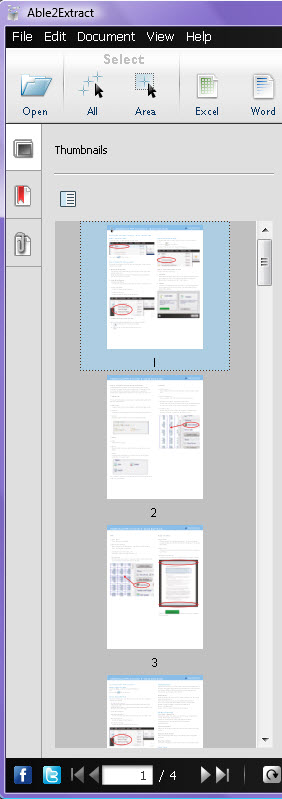
Once you open a PDF in Able2Extract 8, you’ll also notice a Preview Pane on the left hand side. This new side bar gives you better navigational control and a quick overview of your PDF’s pages, bookmarks and attachments. Multiple PDFs are now visually within reach and easy to work with.

Able2Extract Navigation sidebar

Improved OCR Technology

Even the OCR engine in our Professional version has been improved.  Scanned PDFs are usually poor in quality with broken, grainy text. Able2Extract Professional’s OCR technology was tweaked to generate image-based conversions more accurately and smoothly. Trust us.  You’ll feel the difference.  

Able2Extract Professional 8


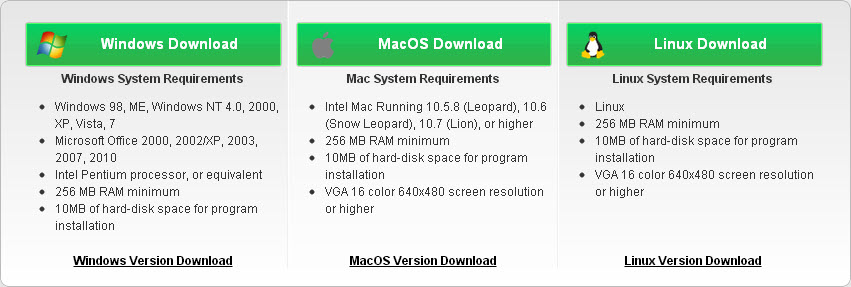
To test these features out for yourself,  download an Able2Extract 8 free  trial from the download page.   Once you’re on the page, just select your platform and click on the download button.

Download Able2Extract 8

Don’t forget to let us know what you think of this latest version!

3 Different Ways To Post Your PDF On Facebook

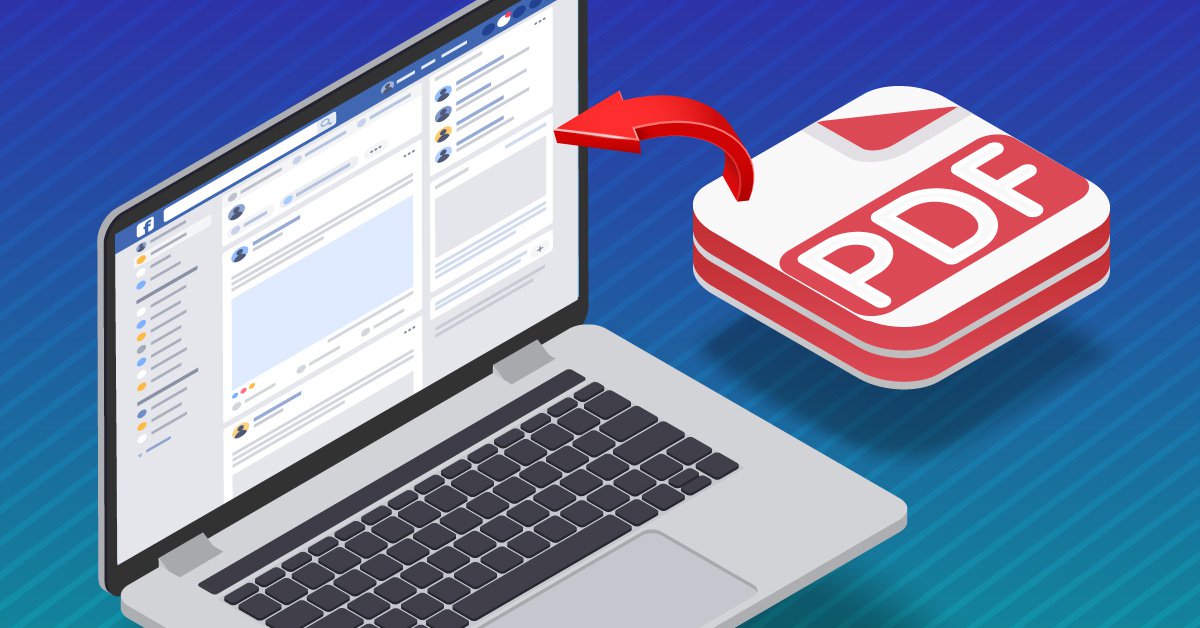
Posting PDF files to Facebook

Everyone loves Facebook, and with good reason.  The social network has rolled personal networking, content sharing, and business marketing all into one platform.  And it’s due to things like Facebook fanpages that have made it easy for businesses and organizations to connect with their communities on a more personal level.

As a result, Facebook Fanpage administrators are always looking for different, more efficient ways to use them. In fact, one user had an excellent idea for her Facebook page that turned into an interesting question about PDF documents and Facebook Notes:

I would like to post a pdf (or Word) document to my Facebook page (not my personal page, to my business page). I would like to post it as a “Note” that everyone who has “liked” our business page can access. And I would like those who view the document to be able to print the document. Is that even possible.

It may sound like a simple thing to accomplish at first, but unfortunately, after some searching, we couldn’t find a direct way to do this. But we did manage to find a few interesting workarounds that came close, and we thought they were worth sharing.

Posting PDF Files With A Link

The first method involved sharing the PDF document as a link, which was probably the simplest way to post a document within a Note:

… We looked into this and, unfortunately, the only things you can embed within a note is an image and a hyperlink. Thus, the only straight forward way to add a document is through a URL linking to the document in your note (such as the Share link provided by our conversion apps or by websites like Scribd.com). And you can only restrict who sees the entire note with the Privacy option.

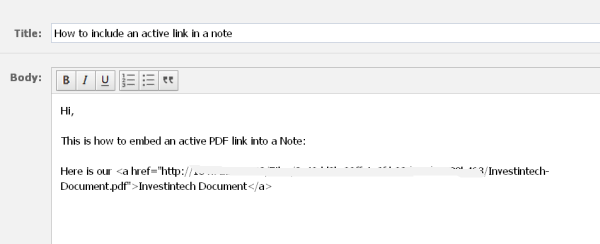
You’ll only have a link to your document, not the actual document itself.  But, on the bright side, you can make the PDF URL an active link by using the HTML tags:  <a href=“ Your PDF link here” >Your text here</a>   with your link and hyperlink text:

 Facebook Notes Adding HTML Tags

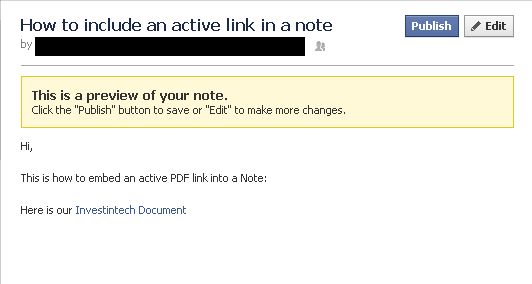
To check your link, hit Preview. The HTML tags should disappear, leaving you with an active link in your Note:

Active PDF Link

Using a link to post a PDF works with group, fanpage, and personal Walls, as well. The only difference is that you have to post the .pdf link into your Facebook status like you would with any web link you want to share on your Wall.

Code Your Page Using Static HTML: iframe tabs App

The second option we were able to find, while a bit more technical, was more visually appealing than using a link:

If you’re a bit tech savvy with coding though, we found that it can be done via Static HTML: iframe tabs App —https://apps.facebook.com/static_html_plus/?fb_source=search&ref=ts.  It will let you embed any type of code you want, including code for a PDF, and can be used for any Facebook app page. The PDF embed code can be provided from any document uploading site (http://youtu.be/UtBWa8dE36M ).

Here’s a direct look at the YouTube Video tutorial:

Using  JPEGs And Photo Albums

However, in the end, the user solved the problem by using a few creative tactics, offering yet a third way to do it:

I converted my documents to JPEG and placed them in “Photos”. Everyone who has access to the page can open Photos, then open an album, then right click on each photo/document page and “print photo”. It’s weird, but it works.

Indeed, it does work.  Even though the content was converted from PDF to JPEG, the PDF content was still viewable.  It was a great trick that even allowed her to restrict printing access only to fans.

If you found a handy solution for this issue yourself, let us know.  We’d love to add it to the list.