 If you’re not sure how to compress a PDF so that you can share and store it more easily, then you’ve come to the right place.
But, before we go on to the tutorial, let’s explore what exactly PDF compression implies.
 If you’re not sure how to compress a PDF so that you can share and store it more easily, then you’ve come to the right place.
But, before we go on to the tutorial, let’s explore what exactly PDF compression implies.
From password encryption to limited file permissions, there are different ways to lock down your PDF content. But oftentimes, you may not fully appreciate what they’re capable of. Those features are crucial because though you may not realize it, a PDF file on its own isn’t as secure as you may think.

Working with MS Excel is hard enough as it is with one worksheet. But when you work with more than one, the difficulty in dealing with that data increases tenfold with every single worksheet you add on.
To help, here are a few basic tips, handy tricks and informative tutorials to make working with multiple worksheets in Excel ten times easier for you.
A simple tip to start—customizing your view. It can be easy to lose track of which sheet you’re working on, especially when you have several worksheets to deal with. To put your worksheets front and center,
a) Open your workbook in Excel.
b) Click on the New Window button for every worksheet you want to view in that workbook.
c) In each new window, click on the tab of the worksheet you want to view.
d) Once the worksheets are displayed, click on the Arrange All button in the View window
e) In the following dialog, select your arrangement view. Ensure that you put a check in the Windows of active workbook option.
From there, you’ll be able to get a bird’s eye view of every worksheet in the workbook you need.
This is another simple tip that may go unnoticed. Because the scrollbar at the bottom hogs all the space at the bottom of your window, the number of worksheet tabs you can see is limited. An annoyance when you have more than 3 worksheets.
To view more, simply hover over the 3 dots at the left of the scrollbar. Then click and drag it to the right. You’ll instantly start seeing more of your worksheet tabs displayed.
In Excel, working with your worksheets as a single group is a quicker way for applying formulas and formatting across worksheets with the same formatting. For instance, let’s say you need to change your monthly rent costs and regular bills. If you’re moving in September and need to update your budget worksheets, grouping them together will let you input the data once to update the entire group.
a) Click on the first worksheet tab you wish to edit.
b) Then Click + CTRL (for non-adjacent worksheet tabs) or Click + Shift (for adjacent worksheets) on the other worksheet tabs to add it to the group.
c) Modify the cell as needed. Click on enter.
To ungroup your worksheets, you can right click and select Ungroup Sheets option. This may seem like a basic tip, but it’s a powerful one to have!
One handy tip for working with data across worksheets is to copy formulas that call for repetitive calculations. We’ve covered this tip before in our post, Work With Excel Data Like A Pro With 9 Simple Tips, but is a great tip worth mentioning again:
a) With the worksheet containing the formula you wish to copy opened, CTRL + clickon the tab of the worksheet you want to copy it into.
b) Click on or navigate to the cell with the formula or data you need (in the opened worksheet).
c) Press F2to activate the cell.
d) Press Enter. This will re-enter the formula or data, and it will also enter it into the same corresponding cell in the other selected worksheet as well.
Despite what you may think, data in multiple worksheets can be more efficient. When you need to add cell values from different worksheets, it’s possible to create and use a formula that can pull data from other worksheets that are in the same workbook and formatted similarly.
This tutorial from ExcelFormulas gives you a solid easy-to-understand explanation of how this trick can make your task easier. It goes the extra mile and even shows you how the same methods can be applied to multiple workbooks, as well.
If you need to combine data from different worksheets, this tutorial from Tuts+ Computer Skills will show you step-by-step how to combine your data from multiple sheets into one pivot table.
This is perfect if you’re keeping track of different types of information that are related but are separated in individual worksheets. You can dynamically connect them into one single worksheet so you can update them all at once. Note that this tutorial uses Excel 2013, but is virtually the same for Excel 2016.
This following trick from ExcellsFun is a bit more advanced, but helpful for getting your Excel data from different worksheets and workbooks into an individual worksheet using PowerQuery.
Using the example of track sheets being used to analyze sales rep performance, this tutorial also links out to a resource where you can access those practice files for a good hands on learning experience to master this skill.
What tips do you have for working with multiple Excel worksheets?

When working to convert PDF data into Excel, you can be swamped with the repetitive task of converting the same data everyday.
For handling large groups of PDFs, there’s the batch conversion feature in Able2Extract. Yet, this option is only ideal for full and automatic conversions.
What about multiple PDF to Excel conversions that need a bit of customization or scanned PDFs that can’t be converted in batch mode, but have the same layout per page?
Part 13 of 13 in our How To Use AutoCAD series
Because AutoCAD projects are highly detailed and require accuracy, being organized with how you work is important. Imagine dealing with a dozen CAD design files with detailed information outlining a single part. If you aren’t organized in how you label each drawing for printing, then recipients won’t have the necessary information for them.
This is why inserting a Title Block in your AutoCAD drawing is essential for plotting (printing) your drawings, especially in a production environment. A Title Block is used to name the drawing part, time and author. Essentially, it provides important information for when the document is printed.
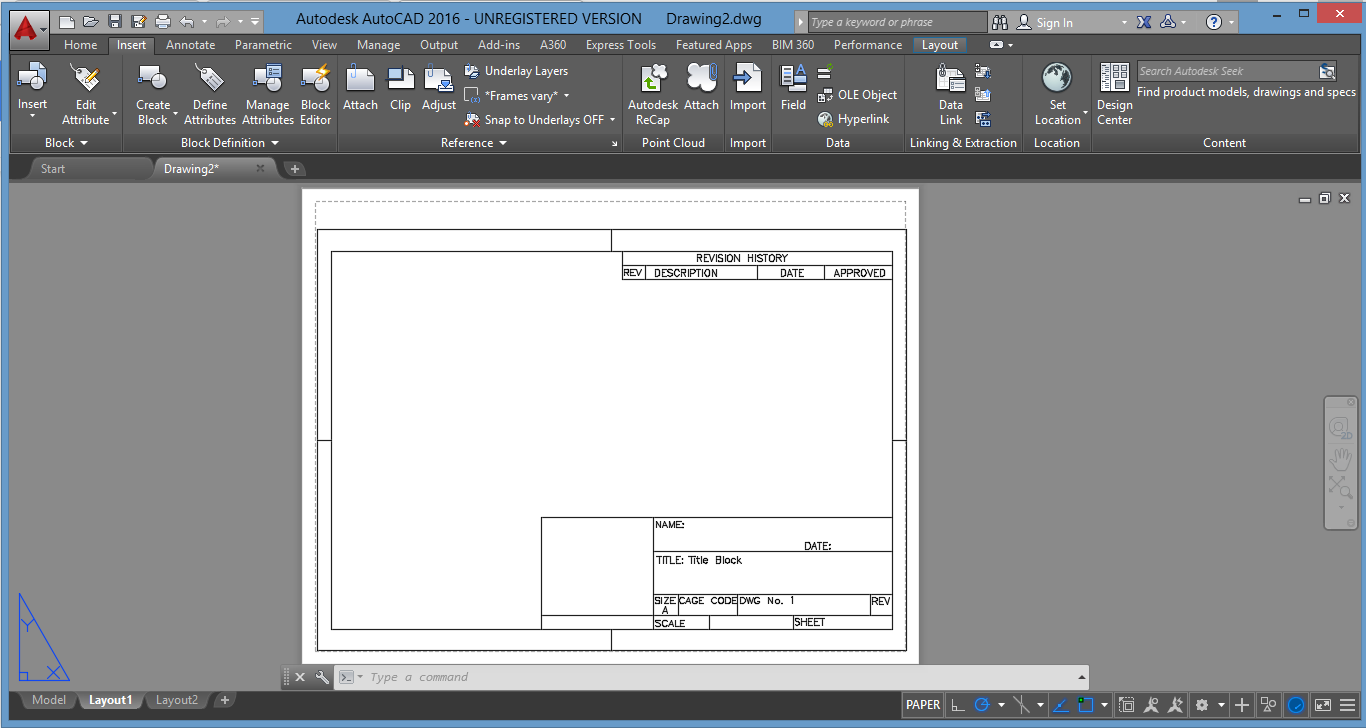
In AutoCAD, you can create your own Title Block template or import a pre–made template. To insert a title block, follow these steps:
1. First, locate or download a Title Block template. There are some basic templates that are already included in the AutoCAD. As the good folks at AutoDesk Knowledge note, the Title Block templates are usually the template files starting with “Tutorial-”.
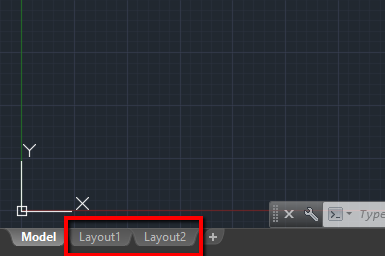
2. Open up a blank drawing and click on the “Layout” tab on the bottom left corner. As you can see by the looks of it, the Layout tab is used for the plotting stage of the production. Right click on the Layout 1 and select Page Setup Manager.
3. Click “Modify” and you will be presented with a pop up window. The most important thing you should pay attention to is the paper size. By default, this is set at (8.5 x 11 inches), so be sure to set it up so that it matches the size of the Title Block template. Select “Landscape” on the Drawing Orientation panel and hit “OK”. We’re now ready to import the template.
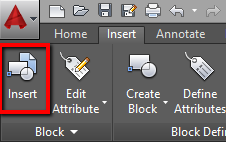
4. Click on the “Insert” tab and then on the “Insert” button on the far left side.
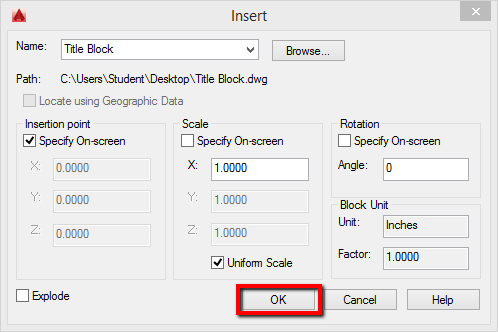
From the pop up menu, click on Browse and select your template. Leave the check boxes as they are – only check the “Specify on screen” box. Hit “OK”.
5. Position the Title Block and left-click to put it in place. Note that the dashed line represents the print border, so keep in mind to position the Title Block within it.
From here you can further edit the individual Title Block elements by entering the “Block Editor” on the Insert tab. This can be extremely useful for repurposing existing title block templates and even customizing your own.