 If you’re not sure how to compress a PDF so that you can share and store it more easily, then you’ve come to the right place.
But, before we go on to the tutorial, let’s explore what exactly PDF compression implies.
If you’re not sure how to compress a PDF so that you can share and store it more easily, then you’ve come to the right place.
But, before we go on to the tutorial, let’s explore what exactly PDF compression implies.
Right now, there are more than 2.4 billion PDF documents roaming the world wide web.
This means that we are slowly, but surely heading towards a major digital milestone– one PDF per person. However, as the PDF gets closer and closer to this superstardom status, it means we need to take our document security seriously and take charge of who gets to see our information.
When you password protect a PDF, you are in full control. You are the puppet master of that document and you decide who gets permission to view, edit and manipulate your work. Do not mistake that with being selfish.
There is a justified reason why people of all professions should consider encrypting PDF documents when transferring important files.
For example, an accountant may often correspond with his or her clients via email. If there’s an unprotected report in that communication, and it contains particularly sensitive information then it’s at huge risk of being stolen or misplaced. And that’s why it’s always smart to password protect your PDF.
The big question is: how do we go about it?
Well, it all comes down to your workflow. We brainstormed some common scenarios when you’d want to perform this particular task:
Let’s go to work.
We’re starting with the most common way of encrypting PDF files and we’re going to walk you through two options:
If you need to password protect an Excel document while printing it to PDF, then go to the next chapter where we discuss that particular task.
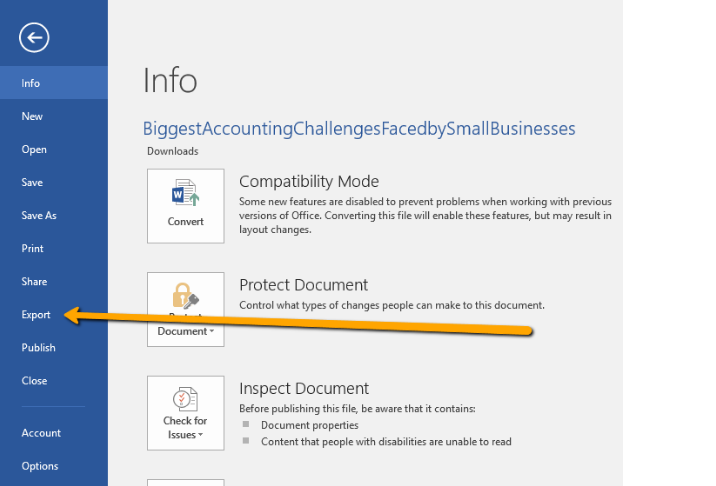
If you would like to print a Word document to PDF and add password protection, then just follow the steps below:
1) Go to File > Export
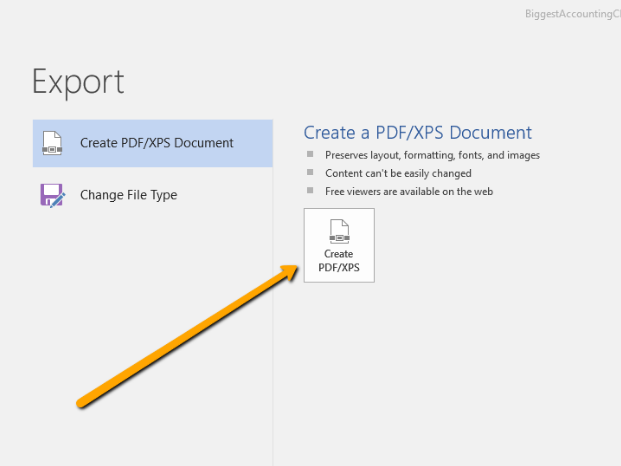
2) Create PDF/XPS document
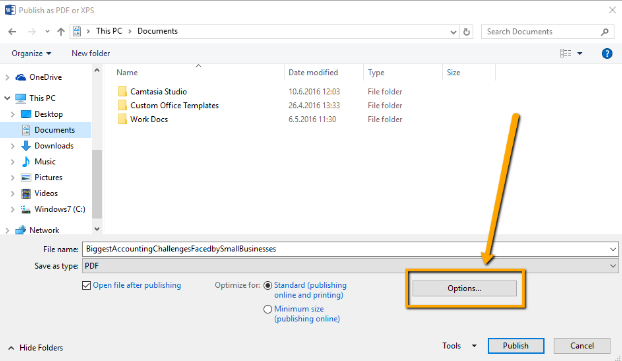
3) Click on Options
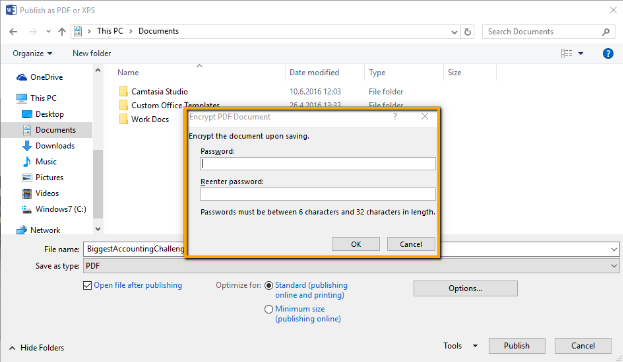
4) Check “Encrypt the document with a password”
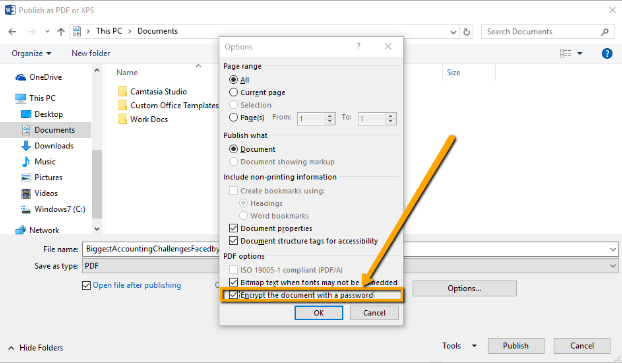
5) Enter the password and hit OK
Job done. You‘ve now successfully created a password protected PDF out of MS Word. But what about other file formats?
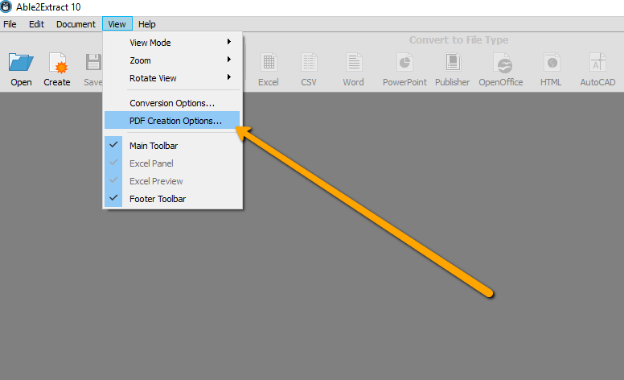
You can use a variety of PDF creation software to print an encrypted PDF document from other applications. For this tutorial we are going to use our very own Able2Extract. You can download the free trial and follow along:
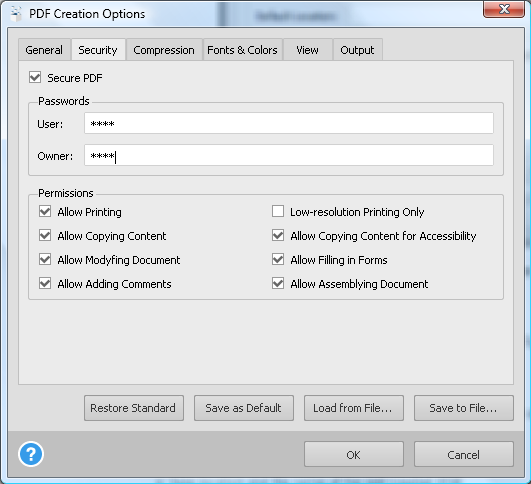
1) Open Able2Extract and go to View >PDF Creation Options
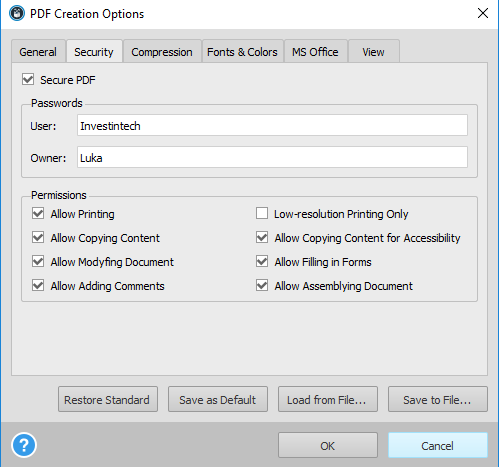
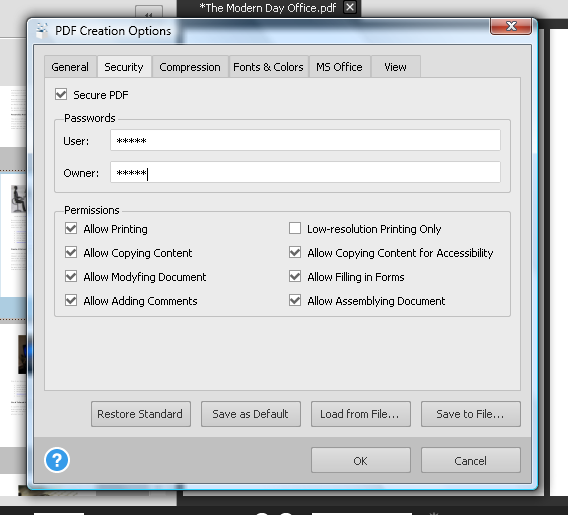
2) Security > Check the Secure PDF and enter the User and Owner names. The User field will be your password. Set up the desired permissions and click OK.
3) Go to Create PDF > open your file (you can create PDF out of all printable formats)
![]()
4) The tool will print your file to PDF and automatically apply the security settings you just added.
The only thing remaining is to save it back to PDF and you’re done. Everything clear? Let’s move on to the next part.
You can add a password to an existing PDF in a variety of ways, but the main choice you will have to make is whether you’re going to do it on your desktop or online.
I would suggest sticking to your desktop when working with bigger documents and possibly using an online tool if you’re handling a PDF with a smaller file size.
However, there’s no escaping the fact that, whatever the size of your PDF file, you may be thinking of encrypting it. This further implies that document security is your utmost priority, which means that you should probably stick with a desktop tool. If you have already downloaded Able2Extract then this will also be a walk in the park.
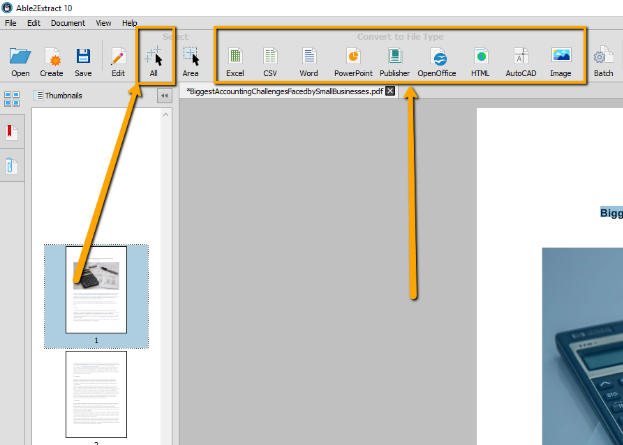
1) Open your unencrypted PDF in Able2Extract, select all and convert it to its corresponding format. If it’s a PDF with textual content then convert it to Word, if not you can choose between the other file formats available.
2) Your converted file will automatically open. Now, just follow the steps below to apply password protection from your MS Office application:
a) Go to File > Export
b) Create PDF > Options > Encrypt the Document
Once again, if you’re trying to create a PDF from Excel and add a password to it, know that it can’t be done in this way — go back to the part where we explain how to create a password protected PDF using software.
Once in awhile, we may come across with a scanned PDF document. What makes scanned PDFs so difficult to work with is that they are essentially images with a .pdf extension, so they can’t be rendered by your regular file editing application.
What we can do in such instances is use Able2Extract Professional, which has integrated OCR (Optical Character Recognition) technology. To apply password protection on a scanned PDF:
So, there you go guys, some actionable tips on how to secure your document and ensure that your work is traveling safely.
Did this tutorial help you? Share it and spread the love. Leave your questions in the comments below.

Instagram selfies are all the rage these days. The app has helped users (and celebrities) produce some of the most widely shared pictures on the web.
Who doesn’t like to take a fun pic when they’re out and about or when a memorable family moment crops up?
Yet for some, Instagram is a professional tool. From graphic designers and photographers to online entrepreneurs and real estate agents, Instagram is an extremely effective platform for marketing and spreading the word visually about what they have to offer.
Whether you have photos of your workspace, products or digital work, a PDF portfolio of your best Instagram shots is a super easy way to enhance your professional pitch and drum up some business. Here’s how.
The first thing to do is download your Instagram photos. DInstagram is a Chrome extension that allows you to download individual Instagram photos. To do this:
a) Install the extension on Chrome.
b) Log into your Instagram account (this will also work if you aren’t logged in and are viewing your account’s photos, too).
c) Click on the photo you want to download.
d) In the upper right hand corner, click on the DInstagram Select your format (choose either PNG or JPG). Select the image size (Big, Medium, Small). Click on Download.
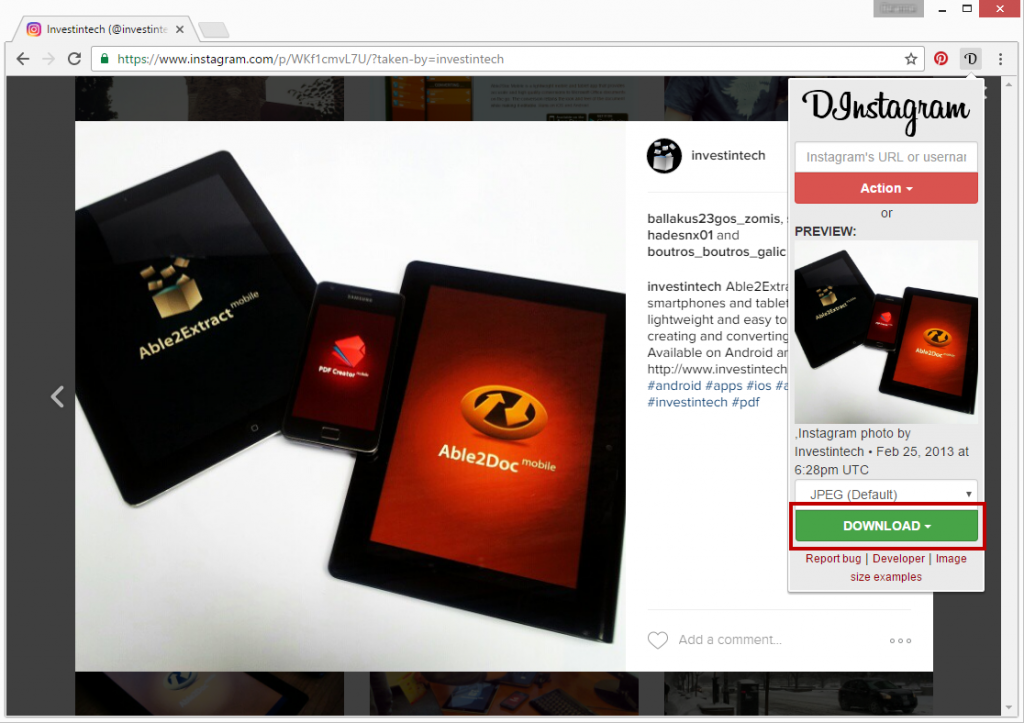
e) Save the photos onto your computer. Tip: create a new single folder for all your photos for easy access.
The next step is actually getting those photos into the PDF format. This is where Able2Extract 10 comes in handy.
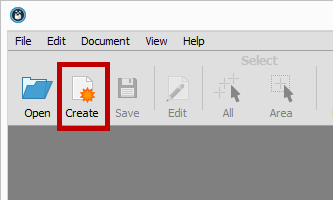
a) Open Able2Extract 10.
b) Click on the Create icon in the toolbar.
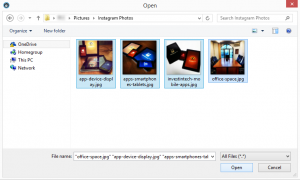
c) Select your image files. Able2Extract 10 will let you quickly open a number of images simultaneously just by selecting multiple files at once. Click on Open.
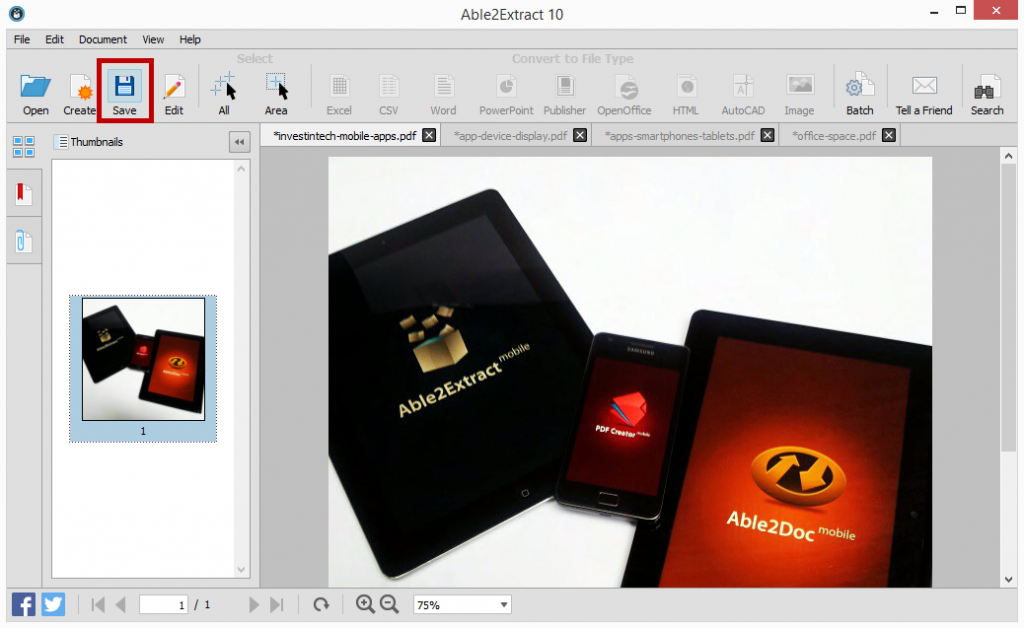
d) In each tab, click on Save.
Tip: Just as you did previously, create a new folder for all the PDFs you will be creating. This will give you a place to export any other future Instagram shots in PDF you may want to include when you update your portfolio.
Now that you have all your image files saved as a PDF, you can start putting them together into one PDF file. You can continue on from Able2Extract. No need to exit the application. You can close off all but one of the tabs.
In that one tab you have left opened,
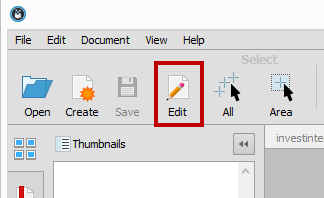
a) Click on the Edit icon from the toolbar. This is the file from which you will be creating your PDF portfolio. You can rename the file later on as needed; no need to worry about that just yet.
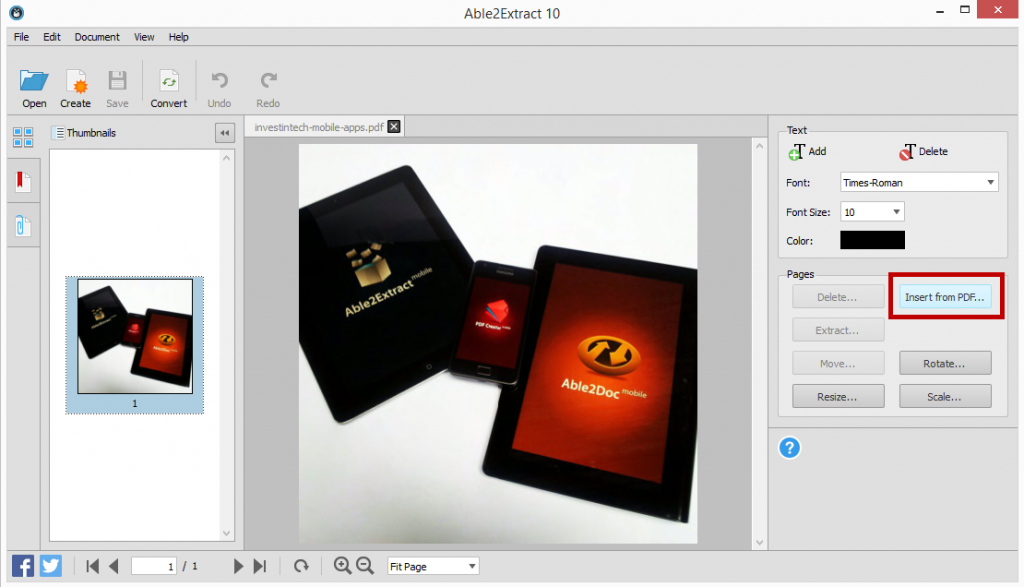
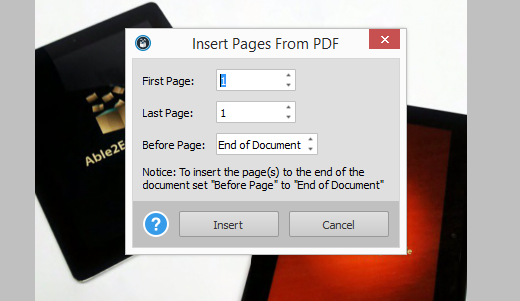
b) Click on the Insert from PDF… option in the Editing panel. One by one, you can add your newly created PDFs to the file by selecting it and clicking on Open.
In the pop up dialog, leave the value in both page fields to 1 (it will be the first and last page you insert). You can decide the order of your images by using the Before Page field:
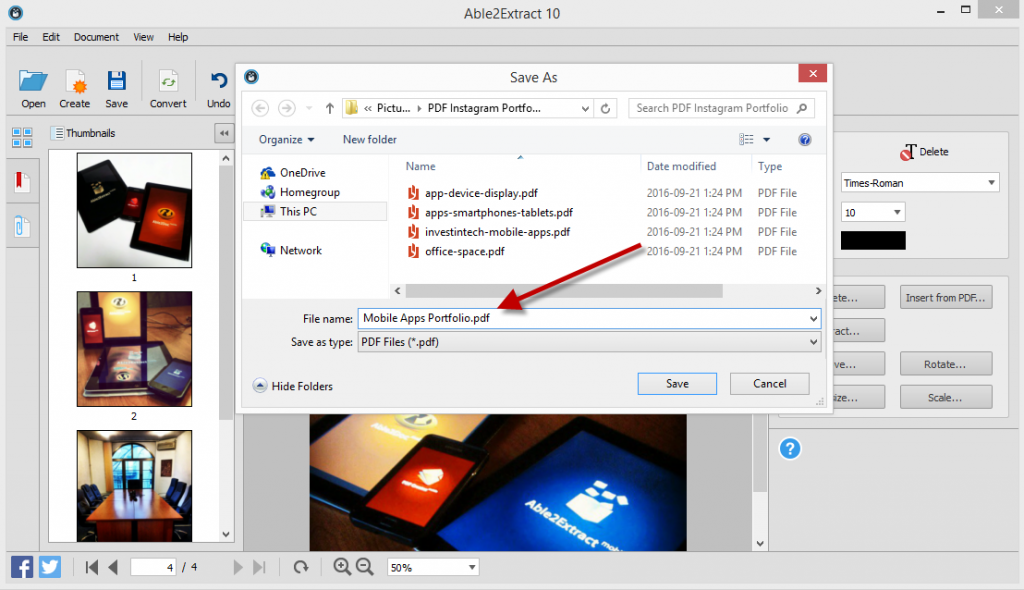
c) Once all your PDF photos are inserted, click on the Save icon once again. Or as mentioned above, you can rename the file by going to File > Save As… and renaming your file.
The final result? A professional looking PDF portfolio made from some of your best images:

You can repeat the above steps in this third section to get other PDF content into the portfolio for a complete look. Add a title page, PDF pages with company information, a section on your services, testimonials from clients or even add a page with a list of publications that have featured your products.
How effective your portfolio becomes is up to you, so show off your best stuff!
We’re happy to announce today that Able2Extract 10 has just been released!
Continuing from the innovation and success of the last version, Able2Extract 10 comes with a number of great features. With PDF creation and editing you wouldn’t think that it could get any more advanced than it already is. But it has!
With this latest version, we’ve pulled out all the stops. You’ll find a lot of new PDF power features that will improve your PDF productivity and business intelligence workflow by more than half.
From PDF editing to improved Excel conversion, Able2Extract 10 has all the PDF capabilities you’ll ever need to keep up with your work. Get a good look at what the new Able2Extract 10 has to offer.
We’ve always known that highly valuable information can come in any format, not just PDF. So to prevent you from missing out on accurate data assessments, we’ve included the ability for you to convert almost any format directly to Excel!
So whether you have a table in Word or information locked away in an XPS file, you can now get that data into an Excel spreadsheet and perform your analysis on complete data sets.
Just simply open your file and select your content as usual and choose the PDF to Excel conversion command from the toolbar.
For those who work closely with raw data and text formats, you’ll be happy to know that Able2Extract 10 now has the ability to convert directly to CSV and TSV from the toolbar. In a nutshell, you can now integrate Able2Extract 10 directly into the analysis stage of your workflow.
This is especially handy for data extractions that are used in analytical software programs on the enterprise level. You can even copy to clipboard in RTF/CSV format. Your information analysis can be done more quickly as Able2Extract eliminates the need to convert to Excel and then export to CSV.
For the first time, Able2Extract now has the ability to split and merge PDF files. We’ve made the process simple by allowing you to insert and extract the PDF pages themselves.
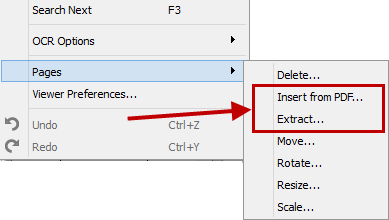
Insert PDF pages from an already existing PDF on your computer or extract PDF pages from the currently opened PDF into a separate file. Your original source PDF isn’t modified. This makes assembling and breaking up PDF documents for professional or personal use simple and hassle free.
Able2Extract 10 will finally let you edit the text directly within the PDF document. You can delete, add, and move existing text in a WYSIWYG editor, making instant corrections to PDF text.
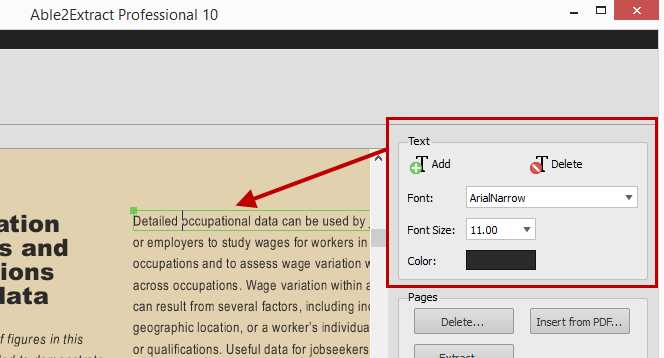
As you can see you can match the font, text colour and size directly from the side editing panel, making seamless modifications to professional documents. To boot, your changes are immediately visible, so you can see the edited content you’re converting.
Because the PDF is the standard used to communicate important content with companies from different industries, following each industry’s document requirements is important. For instance, print publishers, legal proceedings or marketing departments, will need specifically sized PDF pages. And this is why we’ve provided you with the ability to select your PDF page size from the start.
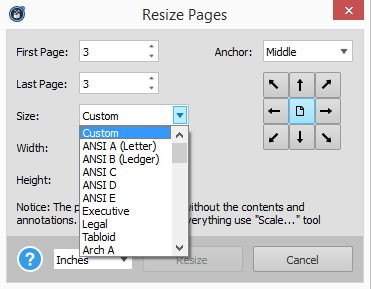
Whether you need legal, letter or executive sized documents, you can adjust your PDF pages as easily as you can convert them. Resize your pages to paper sizes compatible with ANSI, ISO and ARCH specifications. You can even graphically reposition the content of your page, if needed.
This combination of page resizing options makes it so that your PDF can work with any type of businesses, no matter which industry standards they follow.
For even more precise and accurate data extraction into Excel, we’ve updated the PDF to Excel conversion engine. When you convert to Excel, Able2Extract now provides you with a variety of sub options to choose from.
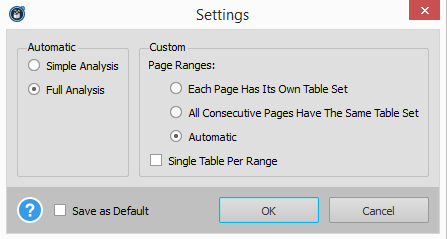
When you convert a PDF table, Able2Extract will better analyze how the source document and its tables are structured so you get even more refined PDF to Excel conversion results than before!
With Able2Extract Professional, we’ve also improved the OCR engine, providing you with more accurate renditions of broken text when converting scanned PDFs. Professionals who need to use legacy information trapped in hard copy can now merge that data with digital data for complete and accurate business intelligence analysis.
Given everything this latest version has, you’ll be looking at your PDF work in a different–hopefully easier, light.
Take it for a test drive yourself. Download the free 7 day trial and get your PDF productivity going!
Here at Investintech, we care about your document productivity and we know that working with multiple documents can be a dreadful uphill battle. Because digital documents and PDFs are an essential part of your day to day work, your document processing routine and PDF tools always need to be updated. They need to be flexible and powerful enough to keep up with you.
This is why we included the features we did in Able2Extract 9. Though you know the PDF tool as Able2Extract PDF Converter, it has gone above and beyond that in this latest version. It can do a whole lot more now—and more conveniently.
Case in point: PDF creation. You may have given the main feature a quick try, but there’s more to this feature than meets the eye. It can get the job of creating secure PDFs done in more ways than one.
Let’s take a closer look.
PDF creation within Able2Extract is just as simple as converting a PDF document. So if you’ve ever converted a PDF file with Able2Extract, then you already have a good idea of how to create one.
In other words, you get a new feature with a familiar set up, eliminating any high learning curves that can waste a good chunk of your time. From the command toolbar:
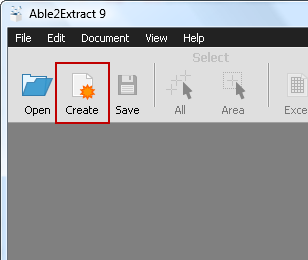
1. Click on the create PDF icon.
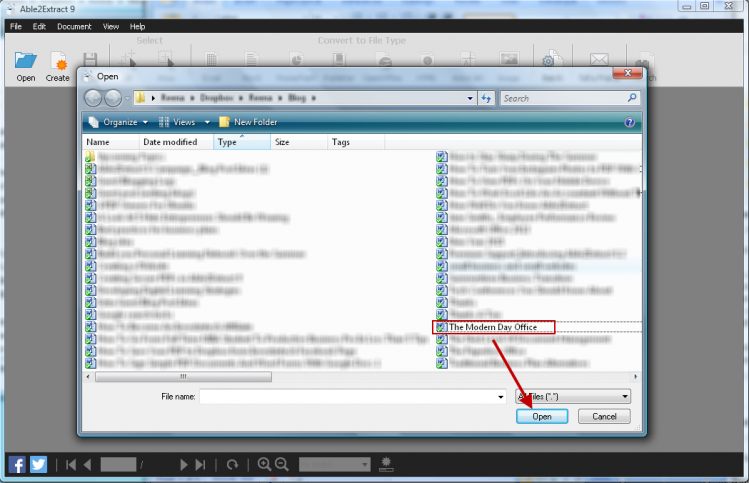
 2. Open your file.
3. Go into the PDF Creation Options… menu and add your PDF security options. Here you can choose a number of settings for your PDF content. Click on OK.
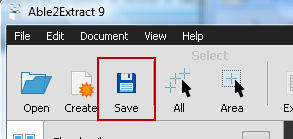
4. Then click on Save to complete the process.
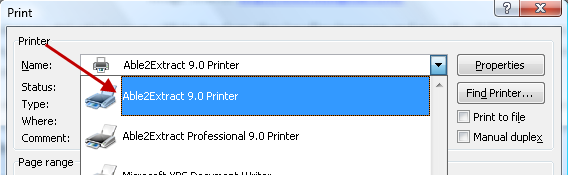
That’s just one method. However, if, like me, you prefer to stay in the application you’re working in, Able2Extract still has you covered. With the virtual printer, you can turn any application into a PDF creator.
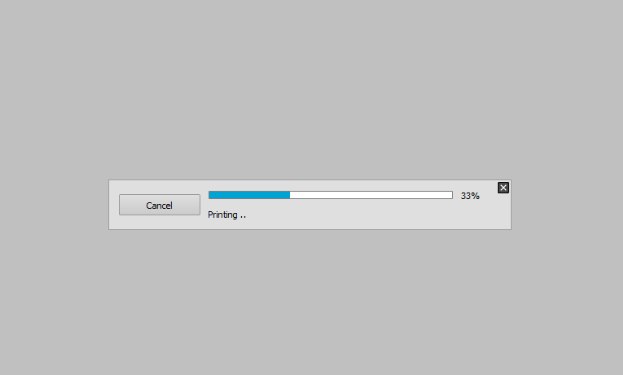
Just print up your document as usual with the Print functionality, but choose Able2Extract 9.0 Printer instead:
Yet because you don’t need to open Able2Extract to create PDFs, you may be thinking that you’ll miss out on all the PDF creation options built into this latest version. Not so. This is where the print dispatcher comes into play.
Adjust Settings With The Print Dispatcher
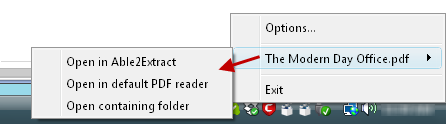
![]() You may have seen this icon lurking around on your system tray after installing Able2Extract.
You may have seen this icon lurking around on your system tray after installing Able2Extract.
The Print Dispatcher allows you to control all of your out-of-Able2Extract PDF creation options.
When combined with the virtual print driver, you can create the same secure PDF just as easily.
On opening the Print Dispatcher, you get everything you need to stay on top of the PDF creation process:
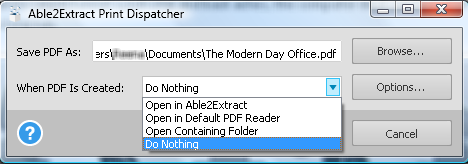
By clicking on the Options… button, you can change the PDF creation settings for all PDF files created through the Able2Extract Print Driver, including the Security settings for each file.
After your security options are set and your PDF is created, you can check in on your new file from the Print Dispatcher and interact with the file as needed.
Give the PDF creation feature a good spin if you haven’t already. This is just one of many new Able2Extract 9 features that let you get up close and personal with your PDF documents.