7 Best iOS Apps for CAD Users, Designers and Engineers

Creating CAD Drawing

Despite the fact that the mobile market expanded to the point where now most of the work is done on the go, AutoCAD remained one of the few software solutions to keep its desktop-first legacy intact.

The folks at AutoDesk definitely recognized the workplace evolution pattern (and even made a mobile version of AutoCAD), but that didn’t change the fact that the art of producing top quality drafts and designs still resides in the realm of the good old mouse and keyboard.

However, engineers and designers still largely belong to that group of tech-savvy people who spend a lot of free time on their mobile phones. Especially youngsters who are just starting out in the business.

That’s exactly why we decided to round up iOS apps that every CAD user needs to have.

Continue reading →

How To Trim Objects Quickly?

Part 12 of 13 in our How To Use AutoCAD series

Along with the many object manipulation features AutoCAD provides,  the Trim command is another common feature you’ll need to be familiar with as you modify your CAD drawings.

Trimming objects in AutoCAD is useful for merging objects at the place of their intersection.  The easiest way to trim objects in AutoCAD 2016 is to use the “Trim” command located on the Modify panel.

1.First, select the objects you want to trim. You can click on them individually or you can left click and drag to group the objects.

Trimming AutoCAD Objects

2.Right click on the blank space to finalize the selection.

3.Left click on the lines to trim them. Right click or enter to finalize the trimming.

Trimming AutoCAD Objects

Note that you can only trim the lines that intersect. The best tip for deleting unwanted lines would be to use the “Erase” command, which is also located on the Modify panel.

How To Remove/Purge Unused CAD Blocks?

Part 11 of 13 in our How To Use AutoCAD series

While working on our designs, we may find ourselves in a situation where we create blocks that we don’t end up using.  That’s why it’s beneficial to clean up the drawing and remove unused blocks, layers, shapes, linetypes and other objects.

This can be efficiently done using the “Purge” command, which identifies and removes the unused items.

1.To access the “Purge” command, click on the application button, on the top left corner of the AutoCAD window. Then go to “Drawing Utilities” > “Purge”.

AutoCAD Application Button

2.You’ll be presented with a pop up. Leave the “View items you can purge” checked and from the box below choose items that you would like to remove. The “Purge” command identifies all items not used in the drawing.

3.Click on “Blocks”, and select either “Purge” or “Purge All”.

4.When prompted, choose “Purge this item”.

In certain cases, there may be items nested (located) inside other items. You can easily remove those by checking the “Purge nested items” check box. To further master your drawing output skills, read this tutorial on How to Clean Up Your AutoCAD Drawing.

How To Create A Custom Keyboard Shortcut?

Part  10 of 13 in our How To Use AutoCAD series

Becoming a master in AutoCAD means that you should be able to incrementally improve your skills and thus, your productivity. Even though some things may be difficult to learn at first, eventually it’ll become second nature and  you’ll forget about tracking down the location of your favorite tools on the dashboard.

One of the things you can do to instantly increase your drafting speed is to create custom keyboard shortcuts for existing commands.  As part of our How to Use AutoCAD series, we’re here to show you how to go about creating them.

This is easily accomplished through AutoCAD’s Customize User Interface (CUI) feature.

Customizing AutoCAD Interface

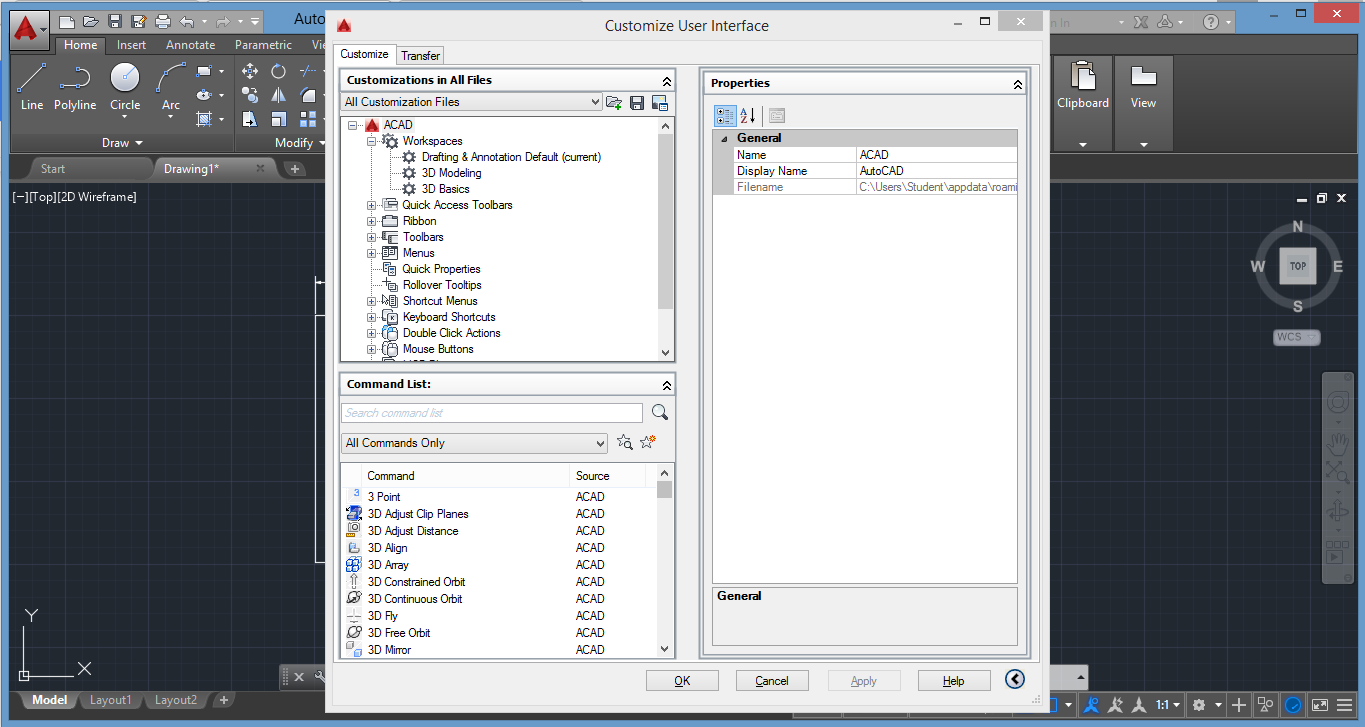
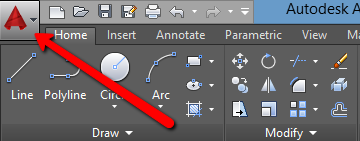
1. To access CUI, enter “cui” in the command line and press Enter. Alternatively, go to “Manage” tab, and under Customization panel click on the “User Interface” button.

2. In the command list panel type the command that you would like to assign a keyboard shortcut to. For example, type in “Hatch”. Locate it on the menu below and left click to see its button image and properties.  As you can see from the properties panel on the left, there is no keyboard shortcut assigned to this command. We’re going to now enable a custom keyboard shortcut for this command.

3. In the “Customization in All Files” panel, expand the last item in the list – Partial Customization Files. Now expand the list in the following order: “Custom” > “Keyboard Shortcuts” > “Shortcut Keys”.

AutoCAD Shortcut Keys

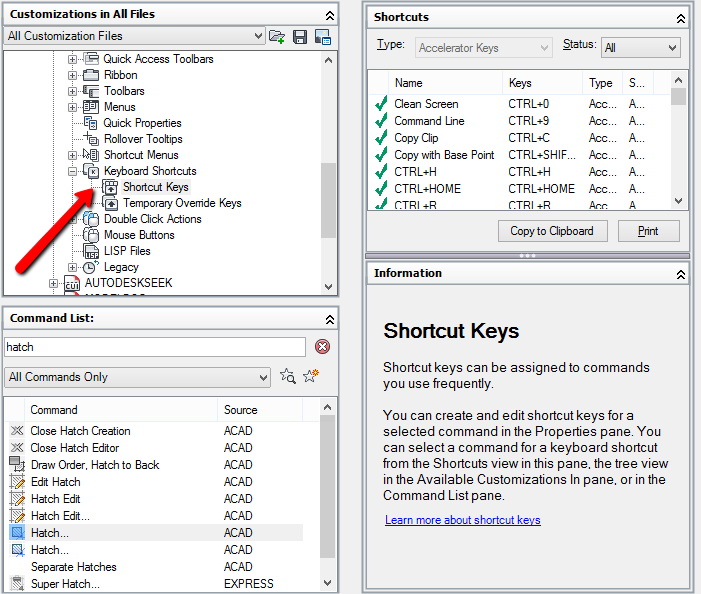
4. Click and drag the desired command from the “Command List’ menu to the “Shortcut Keys” folder above. You should see your command in the properties menu on the lower right side.

Assigning Custom AutoCAD Shortcuts

5. As you can see there is an “Access” command under which there is a “Key(s)” box. Click on it and then on the three dots  which will appear to the right. You can now specify your keyboard shortcut for this command. Hit “Apply” and then “OK”.

Besides assigning custom shortcuts to existing commands, you can even create your own custom commands and macros and assign them your favorite keyboard shortcuts. This tutorial further explains the process:  How to Create a Custom Command.

How To Quickly Create Perfectly Parallel Lines, Parallel Curves And Concentric Circles?

Part  8 of 13 in our How To Use AutoCAD series

While working in AutoCAD, you’ll often come across a situation where you need to draw perfectly parallel lines, rectangles or circles. Whether they’re for designing a structure, designing a machine part, or creating an object, precision is the goal.

Since it’s extremely important to be as accurate as possible when working on your drawings, the best way to quickly create perfectly parallel shapes is by using the “Offset” command.

The “Offset” command in AutoCAD 2016, is located on the bottom right of the Modify panel, on the Home tab.

Locating AutoCAD Offset Command

Here’s how to use the Offset command:

1.Draw a shape that you would like to offset.

2. Click on the Offset command (bottom right on the Modify panel).

3. Select the Offset distance. You can do this in two ways. The first is to enter the distance manually into the number box. The second way is to left click on a blank space in the drawing window and then move your cursor in any direction.

4. Select the object to offset. Left click on the object and you will get a perfectly parallel copy.

Using AutoCAD Offset


As a general rule of thumb, don’t forget to use Offset when drawing stairs, concentric circles or any other element. This command will save you a ton of time editing and re-adjusting your drawing by getting them right the first time around.