


Part 8 of 13 in our How To Use AutoCAD series
While working in AutoCAD, you’ll often come across a situation where you need to draw perfectly parallel lines, rectangles or circles. Whether they’re for designing a structure, designing a machine part, or creating an object, precision is the goal.
Since it’s extremely important to be as accurate as possible when working on your drawings, the best way to quickly create perfectly parallel shapes is by using the “Offset” command.
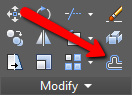
The “Offset” command in AutoCAD 2016, is located on the bottom right of the Modify panel, on the Home tab.
Here’s how to use the Offset command:
1.Draw a shape that you would like to offset.
2. Click on the Offset command (bottom right on the Modify panel).
3. Select the Offset distance. You can do this in two ways. The first is to enter the distance manually into the number box. The second way is to left click on a blank space in the drawing window and then move your cursor in any direction.
4. Select the object to offset. Left click on the object and you will get a perfectly parallel copy.
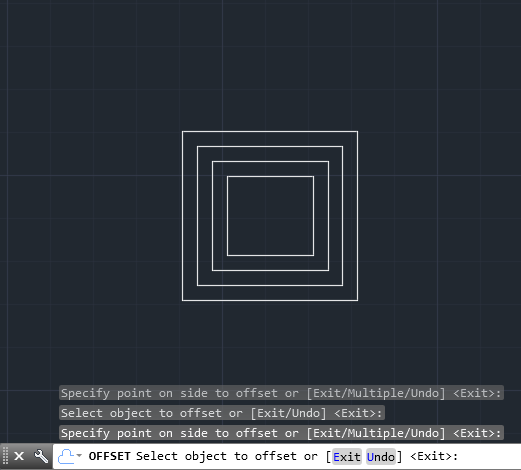
As a general rule of thumb, don’t forget to use Offset when drawing stairs, concentric circles or any other element. This command will save you a ton of time editing and re-adjusting your drawing by getting them right the first time around.